Curs de Formació en Activitats Maker Educatives

El curs es proposa com un espai laboratori on es treballen des de continguts més teòrics fins a experimentació i construcció d’activitats educatives maker que es comparteixen entre tots els participants. A més, aquest curs forma part del procès d’implementació d’un tutor on-line que dóna suport als estudiants en la fase a distància.

Objectius

– Orientat a professorat i educadores interessades en els nous processos amb noves tecnologies.
– Desmitificar l’ús de la tecnologia com a eina pedagògica.
– Aprendre a dissenyar activitats educatives maker adequades a diferents edats.

https://www.tutorbot.eu/

1. Els makers: tecnologia i educació no formal

Avui, els nous temps exigeixen als educadors noves habilitats i nous recursos que la tecnologia ofereix a baix cost.

En aquesta sessió

Tema de la sessió: el moviment maker i l’educació no formal

Al final d’aquesta sessió, haurieu de ser capaços de saber:

  • Què és el moviment maker;
  • Qui són els makers, què estan fent i per què?
  • Alguns conceptes relacionats amb la cultura maker.

Esquema de la sessió:

  1. El moviment maker
  2. Qui és maker?
  3. Què fan?
  4. Per què fan coses?
  5. Els conceptes que fonamenten la cultura maker
  6. Activitat
  7. Conclusió

1. El moviment maker

Potser has sentit a parlar d’espais de fabricació digital o makerspaces, i potser fins i tot has fet servir un, però com s’inicia algú en aquest moviment global?

Aquest moviment es descriu sovint com un moviment de base. Això vol dir que es va iniciar des de la gent, en comptes d’ésser organitzat per un òrgan de govern o un líder inspirador. Al centre del moviment hi ha persones amb habilitats i passió per compartir, que formen una comunitat de creadors.

Cal tenir en compte la idea de que el makerspace és un entorn d’aprenentatge informal dissenyat per treballar i formar habilitats. Ara, per entendre els beneficis de tenir un espai maker en la vostra comunitat o el vostre entorn laboral, explorarem els orígens del moviment.

2. Qui és maker?

Tots som makers

El moviment maker està obert a tothom. Aquest moviment consisteix en persones que utilitzen una barreja d’habilitats digitals i artesanals per fer i compartir invents i creacions de manera creativa per tal de beneficiar-se a ells mateixos i a les seves comunitats.
Molts makers són aficionats i aficionats emocionats per aprendre junts habilitats pràctiques en un espai comú. Molts, fins i tot, esdevenen emprenedors, començant empreses basades en les innovacions que han creat. Són persones de totes les edats, de tots els àmbits de la vida, amb diferents professions i habilitats, totes reunides pel seu amor per fer.

«Nosaltres» és més intel·ligent que «jo sol»
Treballar amb altres persones en un projecte d’interès personal és habitual en el moviment maker. Els individus col·laboren per compartir habilitats, coneixements i consells per aconseguir un objectiu. De vegades, això passa localment, en un club o esdeveniment, però també té lloc en línia. En accedir a la intel·ligència col·lectiva, organitzat per un gran grup d’individus a tot el món, els makers poden assolir el millor resultat per al seu projecte i el seu procés d’aprenentatge.

3. Què fan?

Les persones fan projectes que tinguin sentit, per exemple, per resoldre un problema a casa, a l’escola, al lloc de feina o a la comunitat, o simplement per divertir-se!

Les habilitats artesanals tradicionals que són més habituals de fer són:

  • Fusteria
  • Metalls
  • Costura
  • Motlles
  • Artesanies de paper i cartró

La creació digital, o la creació utilitzant tecnologies digitals, s’està convertint en la perspectiva creativa més comuna en el moviment maker. Dispositius assequibles com Arduino i Raspberry Pi permeten als makers i educadors crear invencions digitals que expressin alguna cosa sobre qui són i ajudar-los a trobar solucions per a problemes i tasques en la seva vida diària.

Les habilitats digitals maker inclouen, entre d’altres:

  • Programació d’ordinadors
  • Maquinari dels ordinadors
  • Robòtica
  • Dispositius connectats
  • Internet de les coses (IoT)
  • Ús de dades obertes
  • Informàtica física

4. Per què fan coses?

Segons Liam Grace-Flood, es tracta de fer junts i de «reunir-se». Es tracta de la innovació, que ve de la gent per a qui es fa. Es tracta també d’integrar la tradició de l’artesà, de l’artista, etc. per construir coses. Es tracta de codi obert i pensem que es pot aconseguir més si treballem junts que si treballem sols o competim entre nosaltres. Es tracta de continuar innovant i desenvolupar les coses, alhora que es construeixen vincles i relacions entre les persones. I després, també es tracta de la cultura del codi obert, de compartir i de crear coses de la manera correcta. D’alguna manera: «No es tracta només de fer coses, es tracta de fer comunitat, de fer la diferència i de fer un món més just, obert i col·laboratiu».

5. Els conceptes que fonamenten la cultura maker

La cultura maker es basa en conceptes relacionats amb la creativitat, el fer i l’aprendre, que comparteixen els que formen part del moviment maker:

Aprèn fent

Aprendre participant en una activitat no és un concepte nou, sobretot en l’educació, i és fonamental pels makers. Algunes de les paraules que s’utilitzen per descriure aquest concepte són jugar, construir, inventar i crear. Aquests evoquen imatges de l’ús de l’experimentació i l’obtenció directa per aprendre i mantenir-se motivats.

Autodirigit i divertit

Tenir la llibertat de dirigir el vostre propi aprenentatge és molt motivador. Les idees dels projectes makers se solen centrar a resoldre un problema personal, local o global. Els makers tenen una idea que desglossen en parts per identificar on caldrà buscar habilitats que encara no tenen, i després comencen a aprendre-les a mesura que construeixen el seu projecte, sempre millor amb altres persones que poden aportar el coneixement que no tenim. Es tracta d’una exploració personal, gairebé juganera, que acaba amb un resultat físic i un procès d’empoderament.

Compartir

A la cultura maker, els i les creadores comparteixen no només el projecte complert amb els altres, sinó també els mitjans i el procés pel qual han arribat a crear, per tal d’aprendre més a l’hora d’escriure un tutorial o una guia, obtenir comentaris i ajudar a altres persones que ho desitgin a fer alguna cosa similar. Els i les makers també comparteixen les seves habilitats entre ells a través de reunions, tallers i esdeveniments com les Maker Faires. (https://makerfaire.com/)

Treballar en obert

La creació maker pot ocórrer a nivell local, però compartir el que es fa sovint passa globalment mitjançant la publicació en línia del procés de construcció, compartir el codi, el disseny del projecte, els consells sobre la construcció i les lliçons apreses. Les publicacions en blogs i el contingut de vídeos en plataformes obertes i compartides són maneres populars en què els makers deixen en obert les seves experiències per ajudar a informar millor la comunitat en general.

Reciclar i reutilitzar

Es produeixen molts residus en les nostres activitats diàries. A mesura que actualitzem els nostres gadgets de forma regular, els residus electrònics són cada vegada més un problema. Molts makers reutilitzen aquests productes descartats per construir els seus projectes. Per tant, els makerspaces sovint estan plens de contenidors per a plàstics, fusta, cartró, residus elèctrics i joguines velles de les quals qualsevol pot agafar el que necessita. Alhora que en el propi espai es treballa la minimització de residus quan s’utilitzen materials i els que finalment es descarten es col·loquen en contenidors específics.

Part d’aquests continguts han estat ampliats i remixats del curs BUILD A MAKERSPACE FOR YOUNG PEOPLE – RaspberryPi Foundation
CC-BY-SA 4.0

6. Activitat

Quins tipus d’activitats maker estàs promovent en el teu entorn, espai d’aprenentatge o makerspace? Comparteix-ho amb nosaltres per mail.

7. Resum, en aquesta sessió:

Hem estudiat el moviment maker desde la perspectiva de l’educació no formal.

Els conceptes més importants son:

  • Maker
  • Moviment Maker
  • Aprendre fent

Ara ja estem preparats per definir el moviment maker i la figura del maker. També sabem quins conceptes estàn relacionats amb la cultura i el moviment maker.

La propera sessió, donarem un cop d’ull a les activitats educatives maker, per aprendre què son, com es fan i quins objectius.

2. El moviment maker i les activitats educatives maker

Són activitats on la tecnologia juga un paper important i està vinculada a les línies pedagògiques que s’estan desenvolupant en l’entorn en el que es produeixen.

En aquesta sessió

Tema de la sessió: la importància de les activitats educatives maker en l’educació

Al final d’aquesta sessió, haurieu de ser capaços saber sobre:

  • Quina és la pedagogia del moviment maker;
  • Quines són les activitats educatives maker;
  • Per què són importants;
  • Què es necessita per dur a terme aquestes activitats.

Esquema de la sessió:

  1. Definició
  2. Per què són importants / interessants les activitats educatives maker?
  3. Què és necessari per desenvolupar aquestes activitats en un entorn educatiu?
  4. Activitat
  5. Conclusió

1. Definició

Una activitat educativa maker és aquella que treballa processos creatius i innovadors amb una perspectiva educativa, posant l’accent en l’aprenentatge pràctic durant el procés i no només en el resultat, i que inclou, d’alguna manera, la tecnologia en tot o part del procés.

Un bon exemple de l’ús de les activitats educatives maker es pot trobar al moviment maker: el moviment maker ha creat la seva pròpia pedagogia, que utilitza el hacking, l’adaptació, el disseny i la creació com a part de l’aprenentatge de la ciència i la tecnologia.

2. Per què són importants / interessants les activitats educatives maker?

Les activitats educatives maker són les que treballen sota un marc de cooperació, respecte l’un de l’altre, treball en equip, inclusió, promoció de la creativitat, aprendre fent i innovació.

En aquest sentit, fer i la creativitat no són conceptes nous, però centrar l’aprenentatge en fer ha introduït un nou tipus de pedagogia pràctica, una pedagogia que fomenta la comunicació, la comunitat i la col·laboració (una mentalitat DiT «fem-ho junts«), l’aprenentatge distribuït (aprenent de diverses fonts), creuant fronteres i pràctiques d’ensenyament receptives i flexibles.

El moviment maker permet a les escoles i entorns educatius tornar a una educació més constructivista. Permet que els estudiants siguin més creatius, independents i sàpiguen més sobre tecnologia, com qualsevol educació moderna hauria de fer.

Què és el constructivisme? Es tracta d’un tipus d’ensenyament, introduït per Jean Piaget i desenvolupat per Seymour Papert, en el qual l’estudiant participa en el seu propi aprenentatge. Crea al mateix temps que aprèn, i aprèn mentre s’enfronta a materials, objectes, problemes, etc. Aquest tipus d’aprenentatge és molt important: «l’aprenentatge passa millor quan els alumnes construeixen la seva comprensió a través d’un procés de construir coses per compartir amb els altres ”(Donaldson, 2014, pàg. 1).

Avui en dia, els nens (i adults) no haurien d’aprendre d’un conjunt de teoria i coneixements donats, sinó de l’experimentació, la creativitat, etc. A més, això permet desenvolupar una manera de resoldre problemes entre iguals.

En aquest sentit, les activitats makers són una eina molt interessant per als professors i educadors, que es poden utilitzar en qualsevol lloc i en qualsevol moment.

A més, les activitats maker són també una manera excel·lent d’implicar el disseny en l’educació. El design thinking és una manera de resoldre problemes abans, durant i després d’una activitat. Això el distingeix de l’aprenentatge clàssic, on l’estudiant replicarà els coneixements només després de rebre-ho.

Finalment, l’ús de les activitats makeren l’educació també proporciona una millor alfabetització mediàtica. De fet, avui ens trobem davant d’una profusió de mitjans, ja sigui en línia o fora de línia. En les activitats maker, com l’alumne ha d’obtenir informació autònomament, aprèn a utilitzar mitjans de comunicació i on trobar informació. En definitiva, ha d’ubicar-se entre els fluxes d’informació (vídeos, articles, llibres, llibres electrònics, llocs web, blocs, etc.).

3. Què és necessari per desenvolupar aquestes activitats educatives maker?

Un equip

Cada activitat té un equip humà que la pensa, la prepara, la porta a terme i l’avalua. I en algunes ocasions, aquest equip també rep l’activitat, i els que ho duen a terme són personal extern al seu espai o projecte.

Ens podem trobar diferents perfils:

  • Responsable d’activitats de programació, horaris, etc.
  • Facilitdors o facilitadores, s’encarreguen de dur a terme l’activitat.
  • Segons on es desenvolupi l’activitat, trobarem personal responsable dels nens o joves que participin en aquest lloc. És important implicar-los com a part del procés.
Un espai

L’espai és el lloc on es durà a terme l’activitat. Una activitat d’aquest tipus es pot fer en qualsevol entorn que satisfaci les necessitats logístiques.

Normalment, aquest tipus d’activitats es poden produir i desenvolupar a:

  • Una aula o espai dins d’un centre cultural, biblioteca o centre cívic.
  • Una aula o espai dins d’una escola.
  • Un espai dins d’un esdeveniment més gran (festivals, congresos, etc.).
  • Un Makerspace.
  • Al carrer.

Per triar l’espai cal tenir en compte:

  • Endolls disponibles, bona il·luminació.
  • Taules o espais per treballar en grup.
  • Àrea espacial: assegureu-vos que és suficient per al nombre de participants, monitors, equips tècnics, etc.
  • Possibilitat d’organitzar les taules o l’espai segons la dinàmica del taller.
  • Espai per organitzar el material de l’activitat.
  • Internet.
  • Nombre i tipus d’ordinadors.
  • Equips de so, micròfons, etc.
  • Pissarra.
Materials | Recursos

Els nens i les nenes tenen un potencial creatiu gairebé innat amb gairebé qualsevol cosa, però també es forma la creativitat. Treballar amb diferents materials i noves eines pot comportar processos d’empoderament. Al mateix temps, cal tenir cura en introduir materials i eines perquè no es tornin decebedors.

Centrar les activitats educatives maker exclusivament en materials o eines ens poden portar a errors. Hem de treballar amb materials i eines eficients, versàtils i inspiradores que coneguem bé com utilitzar. Els materials reciclables o reutilitzables, com ara cartró o jocs de construcció, ens poden ajudar a crear nous interessos i oferir experiències transformadores.

En qualsevol activitat podem trobar recursos i materials cedits per l’organització de l’esdeveniment, la institució, el centre cívic o cultural i que complementarem amb els nostres propis recursos.

Material fungible

És el material, ja sigui de papereria o tècnic, que, mitjançant l’ús de l’activitat, acaba inclòs en el prototip final i, per tant, es consumeix o s’acaba i ha de ser substituït per a activitats posteriors. Com a exemple:

  • llapis i rotuladors
  • papers i cartrons
  • post-it, clips, etiquetes
  • cinta blava, cel·lo, cola
  • argila
  • gots de plàstic
  • cinta d’embalar
  • fusta, cartró
  • cables
  • bateries (piles)
  • silicona
  • suport per a bateries (piles)
  • mini motors
  • leds
Material no fungible

És el material amb què treballem i que podem reutilitzar en esdeveniments / activitats posteriors. Com a exemple:

  • Soldador
  • Pistola de silicona calenta
  • Cables de connectors amb l’ordinador
  • Adaptadors
  • Cables de xarxa
  • Equips electrònics: plaques Arduino, Makey Makey, etc

4. Activitat

Trobeu exemples a www.thingiverse.com o a https://jam.com/ o https://diy.org/ .

Creeu la vostra pròpia activitat, envieu un PDF amb la vostra proposta.

5. Conclusió: en aquesta sessió

Avui hem estudiat la importància de les activitats educatives maker en un entorn educatiu.

Les idees més importants són:

  • activitats educatives maker
  • Constructivisme
  • Design Thinking
  • Material

Hem pogut definir les activitats educatives maker, a partir de les experiències del propi moviment maker. Hem parlat de la importància d’aquestes activitats. I també hem parlar del que era necessari per dur a terme aquestes activitats.

La propera sessió, estudiarem com dissenyar aquestes activitats.

3. Com dissenyar aquestes activitats?

Com podem dissenyar activitats d’oci que incloguin la tecnologia de manera senzilla?

En aquesta sessió

Tema de la sessió: com dissenyar activitats teducatives maker.

Al final d’aquesta sessió, haurieu de ser capaços de saber:

  • Cada pas de l’organització d’una activitat educativa maker;
  • Quins són els punts més importants;
  • Alguns idees a tenir en compte;
  • Alguns exemples d’aquestes activitats.

Esquema de la sessió:

  1. Organització
  2. Gestió de pressupostos
  3. Comunicació
  4. Preparar l’espai
  5. Participants
  6. Procés
  7. Ordre / neteja
  8. Exemples
  9. Activitat
  10. Conclusió

Introducció

És important saber que l’entorn en què es desenvolupa l’activitat pot convertir-se en una ajuda al procés i motivar l’expressió, la creació i la comunicació. Per això en aquest punt donarem algunes pistes en aquest sentit. També hem preparat alguns arxius tècnics com a model que poden ajudar a organitzar i desenvolupar una activitat. El tutor virtual us els oferirà.

1. Organització

Per organitzar-nos bé, hem de fer-nos les preguntes necessàries perquè tots els requisits de la nostra activitat es compleixin o es resolguin i puguem establir qui serà el responsable de dur a terme cadascun dels punts. Alguns exemples a tenir en compte:

  • Públic: hem de tenir en compte qui són els nostres participants. Les activitats per a nens o joves no són les mateixes que per a adults o persones grans. En qualsevol cas, la gent és l’element clau de cada taller.
  • Continguts: El taller pas a pas. Programa públic.
  • Calendari: temps de preparació, difusió i realització.
  • Lloc: contacte i organització amb la seu on es dóna el lloc.
  • Materials: llistat de necessitats, selecció de proveïdors i lloc de compra.
  • Pressupost: personal, materials, transport, etc.
  • Comunicació: pla de comunicació. Material de difusió.
  • Documentació: qui farà la documentació de l’activitat, vídeos i fotografies, en quins formats. Tenir a punt el document de cessión d’imatge perque signin els participants o els seus tutors.

També és útil saber quins són els nostres punts forts per aprofitar-los i les nostres limitacions per estar preparats.

2. Pressupost i gestió

Normalment, en una activitat maker es tendeix a pensar que l’ús de tecnologies digitals i els costos dels materials reciclats són molt baixos. Però encara que això sigui en part cert, no és del tot correcte. Tant si es tracta d’una activitat amb inscripcions gratuïtes o de pagament, hem de ser prudents, clares i organitzades quan fem el nostre pressupost i qui és responsable de cada part.

La gestió del pressupost i l’activitat dependrà de la seva naturalesa i organització. Qui l’impulsa, l’espai on es realitza, si es troba dins d’un horari concret o és alguna cosa puntual, etc.

En qualsevol cas, el personal, els materials i el transport de la nostra activitat depenen generalment del nostre propi pressupost. Sempre és aconsellable donar un marge estimat sobre els costos de producció per a qualsevol imprevist.

3. Comunicació

Un cop organitzats els continguts de la nostra activitat, sabem on, amb qui i com es durà a terme, és hora d’elaborar un pla de comunicació que ens ajudi a arribar al públic interessat a participar. Cal tenir en compte què passa abans de l’activitat, què passa durant l’activitat i què passa després de l’activitat, és a dir, quins resultats, i afegir-ho al procés de comunicació.

Per a la preparació del pla és recomanable tenir en compte:

El públic

Si els participants són adults, caldrà que ajustem el missatge a uns objectius diferents que si ens adrecem a infants; si l’activitat és d’infants amb pares, llavors caldrà tenir els dos perfils en compte. Ajuda a tenir una idea de si són del barri, com busquen o reben l’informació de l’activitat.

Continguts

Elaborar un text clar i breu del programa, a qui s’adreça, els objectius de l’activitat, les dates i les dades de com inscriure’s i si cal o no. Les fotos o les il·lustracions que complementen ajuden molt.

Material de difusió

Podem utilitzar i adaptar els continguts en fullets, imatges per a xarxes socials, pòsters, etc.

Xarxa i comunitat

No subestimeu el boca a boca. Podem començar a difondre la nostra activitat des del personal del centre, els assistents habituals, etc.

Web

És imprescindible tenir una entrada a la web del projecte o centre amb la informació detallada. Aquí podem utilitzar més fotografies i ampliar una mica més els fonaments i la metodologia de l’activitat o qualsevol informació d’interès. Les dades de registre (data, lloc, hora, preu i contacte) han de ser clares i de fàcil localització.

Xarxes socials

Una vegada publicada la informació a la xarxa, és millor difondre-la a través de xarxes socials, en missatges que proporcionin contingut i que facilitin informació sobre el procés de registre. També haurem de respondre a les preguntes que es presentin.

Permisos

En alguns casos haurem de seguir determinades normes d’ús i necessitarem alguns permisos en funció de la ubicació de l’activitat. Aquestes regles poden provenir de la propietat de l’espai, però també tingueu en compte la llei de protecció de dades.

Drets d’imatge

Sempre és necessari verificar amb antelació que tenim els drets d’imatge signats per cadascun dels participants o els seus tutors legals, això ens ajudarà a documentar l’activitat i elaborar i difondre elements audiovisuals.

Document

D’una banda, si podem fer el registre de l’activitat fotogràficament i en vídeo tindrem material per a la difusió posterior. D’altra banda, ens ajuda molt anotar com s’ha desenvolupat l’activitat, com ha treballat l’organització, muntatge, materials. Com han reaccionat els participants, el seu interès, les seves preguntes, el seu grau de comprensió i integració en l’activitat, etc. I, sobretot, el que ha fallat o es pot millorar.

Un cop feta l’activitat:

Autoavaluació

És important avaluar les accions a posteriori per saber què ha funcionat per a nosaltres i què hauríem de canviar en les nostres accions futures. És útil realitzar enquestes de participació per esbrinar què han après sobre l’activitat, què els ha semblat i si ho recomanaran.

Comunicar

Amb text, fotos o vídeos, és bo fer una publicació a la web amb els resultats, el procés i, potser, alguns testimonis i també difondre’l a través de les xarxes socials.

4. Preparar l’espai

  • Prepara la distribució de taules o espai de treball, depenent de si treballaràs en parelles, grups o individualment.
  • Establir un lloc per dur a terme proves de prototips.
  • Trobeu un espai segur per si cal utilitzar eines que necessitin electricitat o més cura com la pistola de silicona calenta o el soldador.
  • A l’organització de l’espai també pensem que hauríem de fer fotografies o vídeos, per la qual cosa hem de tenir en compte que qualsevol que faci el registre audiovisual pugui fer la seva feina. Però, sobretot, tingueu en compte quines coses no han de sortir a les imatges o si un membre de la família ha denegat el permís d’imatge d’un infant.
  • Superviseu la temperatura i la ventilació del lloc en funció dels materials i eines que s’utilitzaran.

5. Participants

Trobarem alguns participants altament motivats, o alguns altres que simplement seguiran les instruccions i comptaran amb socis per fer coses o fins i tot alguns que necessitaran una atenció més individualitzada.

Al final, l’important és valorar cadascun dels petits èxits produïts i confiar en ells per gestionar el ritme del taller; Si aquestes «celebracions» succeeixen de manera progressiva, generaran l’atenció contínua dels participants.

6. Procés

Al llarg de la realització de les nostres activitats a MakerConvent, sempre hem estat buscant les millors maneres d’afavorir la participació i els continguts que volem transmetre per ser rebuts de la millor manera. En el nostre cas, el procés de design thinking és el que millor s’adapta a aquest tipus d’activitat.

  • 1. Empatitzar

  • 2. Definiu

  • 3. Idear

  • 4. Prototip

  • 5. Prova

Empatitzar
  • Genera expectatives, emocions, interessos.
  • Si és la primera sessió, presentem a cada participant, personal de suport i facilitadors.
  • Fem preguntes sobre conceptes si cal, per conèixer les expectatives i la informació que té cada participant. Escoltem, aclarim els dubtes.
Definiu
  • Expliquem clarament el desenvolupament del què farem durant l’activitat, pas a pas. (per exemple, treballarem amb materials reciclats, en grups, agafarem un motor, col·locarem un suport per a les piles, el connectarem i ho farem per …).
  • Donem algunes instruccions. (p. ex., cal tenir molta precaució amb la impressora 3D per …).
  • De vegades es mostren vídeos o prototips per donar una idea dels conceptes i del que volem aconseguir.
Idear
  • Com ho farem. Ens organitzem en grups o en parelles.
  • Lliurem els materials.
  • Comencem a pensar, a dissenyar, a dibuixar, a inventar.
Prototip
  • Treballem cartró, fusta, paper, etc. i desenvolupem la nostra idea per produir un prototip inicial.
  • Els sentiments, els resultats i el que s’aprèn es comparteixen i es comenten entre tots, de manera que rebem consell i millora del grup. La contribució de les idees sempre ha de ser positiva.
  • El prototip final ha de ser de mida real, de manera que s’assembli al màxim al que volíem aconseguir.
Prova
  • Hem provat el prototip, hem corregit.
  • Si l’activitat té més sessions, tornem a la fase de definició o de prototip, segons sigui el cas, per millorar o corregir el nostre prototip final.

7. Ordre i neteja

És important, des del començament de l’activitat, que els participants participin en l’ordre i la neteja de l’espai i dels materials. Un cop finalitzada l’activitat, podem recollir tots els materials restants, col·locar les restes a les cistelles de reciclatge corresponents i deixar l’espai com l’hem trobat. Molts cops es tracta d’espai multidisciplinars on passen més activitats i cal deixar l’espai endreçat per a la resta d’usos.

8. Exemples

Proveu un projecte de creació maker
Ara que heu après sobre la fabricació maker, esteu preparats per crear-los! A continuació es presenten tres projectes de creació maker. Seleccioneu la que us interessi més. Assegureu-vos d’enregistrar les vostres observacions i desar els vostres resultats perquè pugueu compartir-los al final.

Il·lumineu un LED en una figura de plastelina

En aquest projecte, construireu una figura amb plastelina conductiva, potser un monstre graciòs, un robot, un cotxe… i amb un simple led, cables de cocodril y una placa makey makey faré que s’il·lumini. El projecte està pensat per ensenyar als participants a crear un circuit simple i barrejar tecnologia amb una activitat manual.

Fem música amb materials reciclats

En aquest projecte aprendrem a fer un circuit més complexe amb makey makey i materials reciclats que tinguin la particularitat de ser conductius. Les possibilitats que ens ofereix makey makey de conectar multiples actuadors fabricats per nosaltres amb materials reciclats (elements que al ser pressionats produeixen un efecte, ja sigui sonor o visual) fa que poguem construir instruments musicals amb pintura conductiva, plastelina conductiva, clips o altres elements.

Construim un Drawbot

En aquest projecte construirem un robot simple que dibuixa evolucionant sol per damunt d’una superficie de paper, Necessitarem, material reciclat (gots de plàstic, bases de iogurts…), un motor, un porta piles, 4 rotuladors, una pistola de silicona calenta.

9. Activitat

Comparteix els teus comentaris sobre la teva experiència via mail.

Pel que fa a l’activitat:

  • Quina has fet?
  • Què has après?
  • Has gaudit del projecte?
  • Amb qui l’has fet?

10. Conclusió: en aquesta classe

Avui hem après com dissenyar activitats educatives maker.

Les idees més importants són:

  • Com gestionem
  • Idear
  • Empatitzar
  • Procés

Hem pogut comprovar els diferents passos de l’organització d’una activitat educativa maker. També hem vist uns quants punts a tenir en compte. A continuació, hem revisat alguns exemples d’aquestes activitats.

La propera sessió, estudiarem les habilitats i competències que haurien de tenir en compte en una activitat maker educativa.

4. Quines habilitats i competències s'han de prendre en l’educació dels fabricants?

Com accedir als coneixements bàsics d’una manera senzilla i pràctica per aplicar-se a les activitats.

En aquesta classe

Tema de la lliçó: les habilitats i competències que s’han de tenir en compte en la formació dels creadors.

Al final d’aquesta sessió, haurieu de ser capaços de/sabràs sobre:

  • Què es necessita de l’animador;
  • Quines habilitats i competències s’han d’ensenyar;
  • Alguns punts a tenir en compte.

Esquema de la lliçó:

  1. Per a l’animador
  2. Quines habilitats i competències ensenyar?
  3. Què no hi ha al currículum?
  4. Activitat
  5. Conclusió

1. Per a l’animador

La fabricació digital o la creació d’ús de tecnologia digital permet als estudiants barrejar les seves habilitats tècniques i creatives explorant noves maneres d’inici de la ciència de la computació al món real.

Per exemple, la Fundació Raspberry Pi: dediquen molt de temps a pensar en allò que podeu aprendre fent un dispositiu de fabricació digital com el Raspberry Pi i el que necessiteu per ser hàbil en programació informàtica, electrònica i física. informàtica. Tenen un bon material per iniciar i planificar com treballar habilitats i competències.

El currículum hi és https://curriculum.raspberrypi.org/

2. Quines habilitats i competències ensenyar?

Progressió

Aprendre alguna cosa nova implica progressió. Comenceu amb certes habilitats i coneixements, ia través d’orientació, pràctica i comprensió, podeu progressar progressivament cap a un coneixement i una competència més àmplia i profunda. El currículum de creació digital s’estructura al voltant d’aquesta progressió i, en representar-lo, volien evitar etiquetes relacionades amb l’edat i les preconcepcions relacionades amb aquests que sovint s’associen amb el progrés d’un aprenent. Van sorgir amb els seus propis, fent servir personatges per representar diferents nivells de competència: començant per ser un creador, podeu passar al constructor i després al nivell del desenvolupador abans de convertir-vos en un creador.

Enfocament de fils

Amb aquestes activitats volen ajudar les persones a fer coses perquè es converteixin en inventors, creadors i creadors de demà. La fabricació de digital, STEAM, l’aprenentatge basat en projectes i el retoc són el nucli de la seva filosofia docent, que es pot resumir simplement com «aprenem millor fent». Tenint en compte això, han creat cinc línies que pensen que encapsulen conceptes i habilitats clau en la fabricació digital: disseny, programació, computació física, fabricació i comunitat i intercanvi.

Pensament computacional

Una de les habilitats més demandades per als pares és aprendre sobre ciències informàtiques, Raspberry Pi ho promou i com fer coses amb els ordinadors. Creuen que aprendre a crear amb tecnologia digital ajudarà a la gent a configurar un món cada vegada més digital i preparar-los per a la feina del futur. El pensament computacional és una habilitat molt important. És el procés de pensament que fonamenta la computació i la fabricació digital: formular un problema i expressar la seva solució de manera que una computadora pugui dur-la a terme de manera efectiva. El pensament computacional cobreix un ampli ventall de coneixements i habilitats que inclouen, però no només:

  • Raonament lògic
  • Pensament algorítmic
  • Reconeixement de patró
  • Abstracció
  • Descomposició
  • Depuració
  • Solucionar problemes

En progressar a través d’aquest currículum, els estudiants desenvoluparan habilitats de pensament computacional i les posaran en pràctica.

3. Què no hi ha al currículum?

Si hi ha alguna cosa que van aprendre del seu extens treball en la formulació d’aquest currículum, és que no hi ha dos educadors o experts que puguin acordar el millor enfocament per a la progressió i l’aprenentatge en el camp de la fabricació digital. El seu currículum està destinat a representar les habilitats i processos de pensament essencials per fer les coses amb la tecnologia. Han intentat mantenir els resultats clau tan àmplia com sigui possible i proporcionen exemples com a guia del que es podria incloure a les lliçons.

El seu pla de formació digital no pretén ser un substitut dels currículums relacionats amb la informàtica a tot el món. Esperen que, seguint les nostres vies d’aprenentatge, donem suport a l’estudi de les especificacions formals del currículum i de l’examen d’una manera divertida i tangible. A mesura que Raspberry Pi continua ampliant el seu catàleg de recursos d’aprenentatge gratuïts, esperen que el nostre pla d’estudis creixi i millori, i la vostra contribució a aquest procés serà vital.

Podeu descarregar-vos una versió en PDF del currículum.

Des del curs CONSTRUT UN MAKERSPACE PER A JOVES – Fundació RaspberryPi

4. Activitat

Comparteix els teus pensaments mitjançant comentaris
Estem orgullosos de formar part d’un moviment que pretén donar poder a les persones per donar forma al seu món a través de tecnologies digitals. Valorem el suport de la nostra comunitat de creadors, educadors i entusiastes.

Reviseu el pla de formació digital i utilitzeu la secció de comentaris per reflexionar sobre les preguntes següents:

  • El currículum és útil per al vostre espai?
  • Podeu utilitzar-lo per ajudar-vos a desenvolupar el vostre espai de màrqueting?
  • Hi ha alguna cosa que li manca?

Des del curs CONSTRUT UN MAKERSPACE PER A JOVES – Fundació RaspberryPi

Al llarg de la realització de les nostres activitats, sempre hem estat buscant les millors maneres d’afavorir la participació i els continguts que volem transmetre per ser rebuts de la millor manera. En el nostre cas, el procés de pensament de disseny és el que millor s’adapta a aquest tipus d’activitat.

5. Conclusió: en aquesta classe

Avui hem estudiat les habilitats i les competències que s’han de tenir en compte en la formació dels fabricants.

Les nocions més importants van ser:

  • Aproximació al fil
  • Pensament computacional

Hem estat capaços de definir les competències que s’han de prendre en l’educació per part dels creadors. Hem parlat de la importància de la progressió i d’algunes especificitats de l’educació dels fabricants.

La propera vegada, estudiarem com documentar una activitat.

5. Documentar una activitat

En aquesta classe

Tema de la lliçó: com documentar una activitat.

Al final d’aquesta sessió, haurieu de ser capaços de/sabràs sobre:

  • Per què és important documentar una activitat;
  • Com fer-ho;
  • La importància de l’avaluació;
  • Alguns punts a tenir en compte.

Esquema de la lliçó:

  1. Per què documentar una activitat?
    > Per a nosaltres
    > Per ells
  2. Com es pot documentar una activitat?
  3. Alguns punts a tenir en compte
  4. Activitat
  5. Conclusió

1. Per què documentar una activitat?

> Per a nosaltres

Documentar activitats

La documentació d’una activitat és important per repensar el procés de producció i comunicació. Hem explicat al mòdul 3: «Com dissenyar aquestes activitats?» Que, després de realitzar l’activitat, podem trobar accions que faríem de manera diferent en el futur. Per exemple, si el material d’una marca no funcionava correctament; si necessitàvem una habitació amb més espai o més llum; si la difusió necessita més suport amb socis locals, etc.

També hem de documentar l’activitat per tenir una visió global.

Si vol ser una activitat regular, podem parlar amb els participants i escoltar els seus comentaris sobre el seu desenvolupament. Això inclou una enquesta anònima del que pensen del procés, dels continguts, del resultat i de l’experiència.

Avaluació d’activitats

Un cop finalitzada l’activitat, és molt útil revisar tot el procés, tant la producció com la comunicació, així com el desenvolupament tecno-pedagògic de l’activitat, per tal d’avaluar cada pas i millorar les activitats futures. En aquest pas, la documentació ajuda al procés d’avaluació.

En el desenvolupament de la pròpia activitat, si l’activitat s’ha de fer de manera regular, podem parlar amb els participants i escoltar-ne els comentaris, i inclús incloure una enquesta anònima del que pensen del procés, dels continguts, el resultat, l’experiència. Això ens permetrà millorar-lo per al següent. També ens permet crear un manual per a futures activitats, amb models i passos documentats.

Per a la difusió

La documentació de les activitats també és important per difondre les seves activitats i mostrar el que està fent.

Tenir material

La documentació de les activitats ens proporcionarà material, que serà molt útil no només per a la comunicació, sinó també per a la valoració final de l’activitat, o per il·lustrar l’informe anual de la vostra organització, etc.

> Per ells

Publicitat en línia i fora de línia

L’ús més obvi de tot el material de documentació és comunicar les activitats. Es pot utilitzar per promoure activitats addicionals, per comunicar-se durant les activitats (en directe o poc després), per animar les vostres xarxes socials, etc.

Després del seu progrés

Com hem vist abans, l’autoavaluació és una part important del moviment creador i és un procés important d’educació. La documentació de cada fase del projecte ajuda els participants a adonar-se d’on provenen i on són. Els ajuda a realitzar els seus progressos. És encara més important per a grans projectes, que poden durar uns quants mesos, perquè en aquest cas és més difícil per als participants fer un seguiment del seu progrés.

2. Com es pot documentar una activitat?

Els telèfons mòbils i les càmeres ens ajuden a documentar i capturar l’activitat.

El mateix fitxer tècnic que ens orienta al taller és molt útil quan es fan notes d’avaluació per a cada secció.

En primer lloc, és important pensar com documentar-lo abans de l’activitat. No vol dir que hagi de ser complicat, però ens impedeix oblidar documentar una part de l’activitat, per exemple.

A continuació, trieu com voleu documentar-lo. Si opteu per imatges, vídeos, entrevistes, etc, pot requerir certes habilitats, cert material, per la qual cosa cal pensar-ho i planificar-ho per endavant. El següent pas és triar la persona que s’encarregarà de la documentació. Tothom pot fer fotografies, etc. durant l’activitat, però aquesta persona s’assegurarà que no s’oblidi de res. Si voleu determinats continguts, com ara vídeos, la persona haurà de tenir certes habilitats en aquest domini i saber com funciona el material. Fins i tot pot requerir de vegades més d’una persona.

En activitats amb joves, podem deixar-los documentar ells mateixos. Es permeten fotografies i vídeos.

A continuació, tenim algunes preguntes que es poden fer durant o després de l’activitat i que ens ajudaran a avaluar com han anat les coses a posteriori i entendre millor els processos de cada persona i utilitzar-los per millorar en activitats futures.

  • En quin repte estàs treballant?
  • Quines idees teniu per resoldre el repte?
  • Quines idees semblen les millors?
  • Com es veu el primer prototip? Creus que funcionarà? Necessiteu més treball per provar-ho? Què has après?
  • Què t’ha mogut més?
  • Quina ha estat la millor part del taller?
  • Heu après alguna cosa d’altres companys de classe?
  • Qualitats importants que la meva invenció ha de tenir per millorar-la.
  • Quin va ser el més difícil?
  • Voleu millorar alguna cosa? Voleu fer alguna cosa diferent la propera vegada?
  • Descripció / dibuix / foto / vídeo

3. Alguns punts a tenir en compte

Un darrer punt important: abans d’iniciar l’activitat hem de tenir:

  • Permisos: en alguns casos haurem de seguir unes normes d’ús precises i necessitarem alguns permisos en funció d’on localitzem l’activitat.
  • Drets d’imatge: sempre és necessari verificar amb antelació que cada participant del taller ens va proporcionar els drets per utilitzar la imatge per poder elaborar i difondre elements audiovisuals. Al web podeu trobar un document model per a aquesta transferència de drets. No us oblideu de complir amb el nou GDPR de la UE.
  • Document: d’una banda, si podem documentar l’activitat amb fotos i vídeos, tindrem material per a la difusió posterior. D’altra banda, ens ajuda molt a anotar com s’ha desenvolupat l’activitat, com ha funcionat la vostra organització, muntar-los, materials. També ens ajuda a veure com van reaccionar els participants, el seu interès, les seves preguntes, el seu grau de comprensió i integració en l’activitat, etc. I, sobretot, ens mostra el que ha fallat i què es pot millorar.
  • Autoavaluació: l’autoavaluació és important per als participants. Els permet avaluar com era útil l’activitat per a ells. A més, els fa reflexionar sobre el que han après i el que queda per aprendre. Per tant, és una eina important per al seu camí educatiu.
  • Avaluació general: és important avaluar les accions a posteriori per saber què ens ha funcionat i què hem de canviar en les nostres accions futures. És útil realitzar enquestes de participació per esbrinar quins mitjans o canals han après sobre l’activitat i si ho recomanaran.

4. Activitat

Comparteix els teus pensaments mitjançant comentaris.

5. Conclusió: en aquesta classe

Avui hem estudiat com documentar una activitat.

Les nocions més importants van ser:

  • Avaluació
  • Drets d’imatge

Hem pogut parlar de la importància de documentar una activitat, tant per a nosaltres mateixos, com a organitzadors i per als participants. També vam parlar sobre com documentar una activitat i quins punts cal tenir en compte en fer-ho.

La propera vegada, estudiarem el material, els kits i els coneixements que es poden utilitzar en les activitats dels fabricants.

6. Materials, kits i coneixements

Hi ha molts materials i kits diferents sobre activitats tecnopedagògiques. Aquesta activitat intenta donar una indicació de quins funcionen millor i que es poden adaptar a diferents edats.

En aquesta classe

Tema de la lliçó: el material, els kits i els coneixements que es poden utilitzar en les activitats dels fabricants.

Al final d’aquesta sessió, haurieu de ser capaços de/sabràs sobre:

  • Quin material utilitzar?
  • A quina edat?
  • Alguns equips bàsics per començar a fer;
  • Alguns materials interessants per als fabricants;
  • La importància de la tecnologia.

Esquema de la lliçó:

  1. En aquesta classe
  2. Quin material utilitzar en quina edat?
  3. Equipament per començar
  4. Reflexió sobre els materials
  5. Materials de construcció
  6. Ordinadors
    • Raspberry Pi
    • Perifèrics de computació
    • Micro: bit
    • Makey Makey
    • Arduino
    • FLORA
  7. Activitat
  8. Conclusió

Pròleg

Hi ha molts materials i kits per desenvolupar activitats tecno-pedagògiques. Tot i que podria ser temptador crear un laboratori d’innovació o un espai de màrqueting increïble o fer-hi activitats, sovint és molt millor afegir equips amb el pas del temps. Els materials artesanals i els materials tecnològics són una bona combinació.

1. Quin material utilitzar en quina edat?

Entendre com funcionen els materials i els equips, allò que fan possible, i els seus punts forts i limitacions, és fonamental per al seu ús segur.
L’eina o el material adequat per a qualsevol treball no és només el més eficaç: és el més segur. L’ús segur de l’eina comença amb la conversa.

Quan introduïu una eina i un material per primera vegada, és útil incloure els estudiants a la discussió. Feu preguntes per estimular la discussió. Què notes sobre l’eina o el material? Què us preguntes sobre això? Per a què serveix? Què podria anar malament? D’aquesta manera, la comprensió i els acords sobre un ús adequat i segur es poden construir en col·laboració amb els joves, establint la propietat compartida i la inversió. Les converses resultants poden semblar: «És genial que pugueu fondre les coses amb el soldador. Aposto que també podria fer mal. Es pot encendre el paper? Queda calent després de fer-ho? Com puc fer saber a la gent que encara fa calor quan faig? ”Molts responsables de l’establiment estableixen que totes les eines, des de martells a talladors làser, requereixen entrenament abans de ser lliures d’utilitzar sense la supervisió d’un adult. Fins i tot els entrenaments poden ser dissenyats per ser centrats en la joventut.

A STEAMLabs, per exemple, quan s’introdueix una nova eina, el facilitador lidera una conversa sobre l’eina adequada per al treball, seguida d’una conversa sobre com utilitzar l’eina. Per segona vegada, un nen utilitza una eina, en comptes de dir-los les regles de l’eina, s’anima els nens a ensenyar a un altre nen a utilitzar l’eina, amb un mentor escoltant.

2. Equipament per començar

La clau d’un gran espai de treball no consisteix a tenir totes les joguines cares. Podeu crear un espai de treball increïble en una escola amb les coses més simples: cartró, cinta, LEGO, jugada, tisores i altres eines senzilles. La clau és assegurar-vos que el vostre espai sigui adaptable i centrat principalment en l’experimentació, la creació i la innovació.

Eines tradicionals

Les eines tradicionals són interessants pel fet que participen en molts projectes. Els tornavisos, les tisores, els trepants, les serres, etc. són, per tant, molt interessants per incloure-los al espai de fabricació.

Material d’oficina

Els clips, les brides, els clips de paper, les gomes, el paper i els portàtils de binder són fàcilment disponibles, de baix cost i tenen un potencial infinit. Aquests subministraments simples es poden utilitzar en moltes activitats i amb una creativitat infinita. El paper és un gran exemple: omnipresent, versàtil, o bé donat per suposat o increïblement creatiu, depenent de com es convida al seu ús. Disposar d’una àmplia varietat de tipus de paper a la mà pot permetre tota mena de creacions i prototips.

3. Reflexió sobre els materials

Els materials més eficients són els que es poden reutilitzar. Els conjunts de construcció, el maquinari i els components recuperats es poden utilitzar i reutilitzar en una gran varietat de projectes i exploracions.

Materials Naturals

Penseu en qualsevol nen que s’ha alliberat per jugar al bosc, a un parc, a un jardí o a la platja. És probable que no trigarà molt a començar a reunir materials i crear coses amb ells. Els materials primordials com el fang, els pals, les fulles, les roques, la sorra i l’aigua, abundants en quantitat, ofereixen potencial per a l’exploració de materials, el joc lliure o la planificació i la construcció.

Salvat i reciclat

Molts materials abundants, com ara cartrons i ampolles de plàstic, es dirigeixen en massa cap al centre de reciclatge o, tristament, als abocadors. Hi ha innombrables projectes que es poden fer amb materials reciclables, que vénen en una increïble varietat de noves formes i mides.

Donats, de segona mà i de sobres

Mai no se sap quins materials hauran de donar els membres de la seva comunitat fins que surti la paraula

Project Scraps

Gran part del que es podria considerar «residu» en la fabricació es pot reciclar o ser valuós per reutilitzar i inspirar nous projectes. Sovint, una peça retallada de tela o un tall tallat d’un bloc de fusta podria ser la part perfecta per a un nou projecte.

4. Materials de construcció

Algunes de les millors coses que podeu obtenir per al vostre espai de mà d’obra són els subministraments artesanals senzills. El filferro, la cinta, les escombraries reciclades i el cartró poden crear la base d’unes grans lliçons sobre disseny, materials i enginyeria. Afegiu una mica de paper, cadena i cola calenta i podeu fer moltes coses útils en poc temps.

Podeu demanar a la vostra escola o lloc per a grups antics de LEGO i Meccano que la gent ja no utilitza. De fet, qualsevol joguina antiga que ja no es pugui jugar pot ser una base ideal per a un projecte creador, i també poden tenir components útils que es podrien tornar a utilitzar per a altres marques i construccions.

5. Ordinadors

Sol·liciteu ordinadors portàtils o d’escriptori antics que ja no utilitzin. També podeu enviar una carta demanant als pares que consultin els seus llocs de treball, ja que és possible que les empreses donin teclats i ratolins que ja no necessiten. Fins i tot els telèfons antics i les tauletes són eines útils en un espai de màrqueting per a molts treballs de disseny i codificació.

Raspberry Pi

És possible que sàpigues què és un d’aquests. El Raspberry Pi és un petit ordinador de baix cost amb un sistema operatiu que inclou moltes eines de programari lliure per a programadors de nivell principiant i avançats. A més, podeu connectar-lo als vostres projectes de creació digital a través dels seus pins GPIO i LEDs de control, botons, motors, gairebé qualsevol cosa que pugueu desitjar. La versatilitat del Pi és la seva major força, ja que pot executar projectes utilitzant un gran nombre de llenguatges de programació (incloent Scratch), i també pot ser incrustat en projectes.

Perifèrics de computació

Hi ha alguns perifèrics molt genials i creatius al voltant dels quals els nens poden utilitzar-se per informar-se físicament al espai de màrqueting. Es pot crear un codi per a la majoria d’ells en un navegador web, i alguns (per exemple, el Makey Makey) permeten als estudiants impulsar la seva creativitat i el seu disseny pensant en ampliar el ventall de maneres d’interactuar el món real i el món digital.

Micro: bit

micro: bits són petits dispositius útils per als quals es pot escriure el codi en un navegador i, a continuació, executa el codi compilat sense fils (si funciona amb piles AAA). Al Regne Unit, un milió d’unitats es van distribuir als estudiants el 2016, de manera que és possible que tingueu molta sort demanant als estudiants que els portin a l’espai comercial si no l’utilitzen a casa. Inclouen un acceleròmetre, una brúixola, una matriu de LED, dos botons de contacte i permeten la comunicació sense fils a través de ràdio i bluetooth.

Makey Makey

El Makey Makey és un perifèric connectat per USB que permet als estudiants interactuar amb el seu codi mitjançant la «falsificació» d’un teclat: connecteu el Makey Makey al vostre ordinador portàtil o Raspberry Pi i connecteu qualsevol tipus de material conductor (per exemple, fruita, metall, làmina) , persones) a determinades àrees del tauler amb clips de cocodril, replices un botó al teclat. Makey Makey és un complement versàtil i divertit per a tots els makerspace: projectes que hem vist inclouen un joc de Pacman controlat per un highfive direccional, Dance Dance Revolution en cubetes d’aigua i un paisatge totalment automatitzat que reacciona davant el pas d’un model de model amb sons i llums.

Arduino

Les taules Arduino són dispositius incrustables que poden llegir l’entrada, p. Ex. s’encén en un sensor, un dit en un botó o un missatge de Twitter i converteix això en una sortida, p. ex. activar un motor, encendre un LED o publicar alguna cosa en línia. El programari Arduino és fàcil d’utilitzar per a principiants, però prou flexible per als usuaris avançats, i funciona amb macOS, Windows i Linux.

FLORA

FLORA és la plataforma electrònica portàtil d’Adafruit. És un microcontrolador compatible, arrodonit i arrodonit, dissenyat per potenciar projectes de wearables increïbles. FLORA funciona amb el llenguatge de programació Arduino i l’IDE, i es pot connectar mitjançant USB perquè els usuaris puguin començar a programar-lo immediatament. Una altra manera d’aconseguir que els estudiants conscients de la moda estiguin connectats a la fabricació digital. La família de taulers FLORA té tot tipus d’addicions programables, com ara GPS, LEDs addicionals, sensors, interruptors i fonts d’alimentació.

6. Altres materials

Hi ha moltes altres eines disponibles per al makerspace. De fet, les eines com les impressores 3D, el tallador de làser, els talladors de vinil, etc. són molt emocionants. Tanmateix, són complementàries i no són necessàries per iniciar una activitat de fabricant.

7. Activitat

Crear un PDF amb una activitat dissenyada utilitzant un d’aquests materials tecnològics.

8. Conclusió: en aquesta classe

Avui hem estudiat el material, els kits i els coneixements que es poden utilitzar en les activitats dels fabricants.

Les nocions més importants van ser:

  • Equipament
  • Seguretat
  • Material
  • Ordinadors i perifèrics informàtics

Hem pogut definir l’equip bàsic necessari per iniciar una activitat. Després vam parlar de la importància dels materials. Aquests materials no han de ser especialment molt elaborats, podem reciclar, reutilitzar, etc. També vam parlar sobre la noció de seguretat mentre utilitzem determinades eines i materials. Finalment, vam parlar de la importància de la tecnologia, els ordinadors i els perifèrics informàtics per als fabricants.

La propera vegada, estudiarem l’espai del taller, com organitzar-lo i experimentar en les activitats del fabricant.

7. Espai de taller i experimentació

En aquesta classe

Tema de la lliçó: espai de treball, jugada.

Al final d’aquesta sessió, haurieu de ser capaços de/sabràs sobre:

  • Com dissenyar l’espai;
  • Algunes idees bàsiques;
  • Plena d’exemples i bones pràctiques;

Esquema de la lliçó:

  1. Kit d’arrencada del programa Autodesk: Maker
  2. Facilitar el joc: la ciència darrere de l’art d’implicar els nens petits
  3. Littlebits: Programa STEM Llibre blanc
  4. MakerEd: Playbook Youth Makerspace
  5. Joves fabricants: Playbook del Maker Club
  6. Guia de recursos docents de SpheroEdu k12
  7. Guia de SphereEdu

Pròleg

Al voltant del món, a tots els països, podem trobar moltes experiències i bones pràctiques. Aquí trobem diferents documents relacionats amb aquestes bones pràctiques.

1. Kit d’arrencada del programa Autodesk: Maker

Aquesta guia proporciona deu passos amb onze activitats pràctiques per guiar-vos i el vostre equip durant el procés de desenvolupament i llançament d’un programa de creació a la vostra escola, organització o comunitat. Els fulls de treball i les plantilles a què es fa referència en aquest kit d’arrencada es poden trobar a l’apèndix i en una carpeta de Google Drive. Aquests recursos estan disponibles per utilitzar-los i revisar-los per satisfer les necessitats del vostre equip.

2. Facilitar el joc: la ciència darrere de l’art d’implicar els nens petits

Convertir-se en un facilitador de jocs requereix pràctica i valentia. Els professionals han d’entendre la importància del joc en el desenvolupament dels nens petits, de sentir-se facultat per dirigir sessions que se centren en el procés, i que tinguin exemples concrets que modelin activitats i escenaris; en lloc de receptes, aquests exemples haurien de proporcionar un trampolí per a la iteració i la innovació. El judici professional combinat, habilitat i confiança, que inspira aquest tipus de suport, són la clau de l’èxit a la pràctica.

3. Littlebits: Programa STEM Llibre blancLittlebits: Programa STEM Llibre blanc

Un element bàsic en molts dels programes STEAM de les escoles és littleBits, una plataforma de blocs de construcció electrònics fàcils d’usar que permet a tothom crear invencions, grans i petites, com un cotxe de conducció personal, un robot de dibuix d’art o fins i tot un prototip d’un braç protésic.

Durant els últims sis anys, l’equip littleBits ha treballat amb milers d’educadors de tot el país per implementar programes pràctics de codificació STEAM. Des de les escoles que són molt noves en STEAM fins a escoles i districtes que estan totalment immersos a l’educació STEAM, littleBits ajuda els educadors a trobar les millors estratègies per escalar els seus programes únics. Abans de compartir alguns dels nostres aprenentatges al camp, donem un pas enrere i preguntem «per què».

4. MakerEd: Playbook Youth Makerspace

Benvingut a la Playbook Youth Makerspace! El nostre objectiu és ajudar-vos a guiar-vos i inspirar-vos a elaborar espais que siguin reflexos de tothom de la vostra comunitat, especialment els joves que se’n beneficiaran (al llarg d’aquest llibre, «la joventut» fa referència a nens de totes les edats). Esperem que aquestes pàgines siguin un catalitzador de les vostres exploracions, cerques a Internet i lectures addicionals.

5. Joves fabricants: Playbook del Maker Club

A través de Young Makers, animem a tothom a que comencin a fer en les seves comunitats i escoles per crear alguna cosa de la seva pròpia imaginació. Sabem que la idea de posar en marxa un club pot ser descoratjador, ja sigui per trobar un establiment comercial, reclutar joves creadors, reclutar mentors, fer front a la responsabilitat, etc. Aquesta llibreta està dissenyada per ajudar-vos a navegar pels problemes. Està escrit per a responsables de clubs que representin els joves fabricants a la comunitat en general i que coordinin les activitats d’un grup local de joves que ho fan.

6. Guia de recursos docents de SpheroEdu k12

Sphero Edu proporciona un conjunt d’eines sense límits en el seu potencial. El nostre programa va més enllà del codi incorporant robòtica i tecnologia amb activitats de col·laboració STEAM, fomentant la imaginació dels estudiants de manera que cap altre programa educatiu pugui. Què podeu fer amb Sphero a l’educació? Tot i que les possibilitats són infinites, a continuació s’indiquen algunes idees sobre com podríeu integrar Sphero al vostre entorn educatiu.

7. Guia de SphereEdu

Aquesta guia va ser escrita per proporcionar un programa de suport a una escola, una biblioteca o un espai de treball posterior a l’escola per començar a utilitzar Sphero i mantenir una certa dinàmica inicial. En altres paraules, per ajudar a establir un programa d’ensenyament que aprofite Sphero en un espai de màrqueting, donant suport a tot, des de projectes dedicats a creadors alineats amb el currículum fins a inventes / creacions originals dirigides per estudiants a programes extraescolars i fins i tot a jocs gratuïts.

8. Conclusió: en aquesta classe

Avui hem estudiat com els altres pensen en fer educació, com les empreses que treballen en programes educatius o creen estris STEAM fan connexions amb l’educació i els espais de fabricació.

Les nocions més importants van ser:

  • Reflexió
  • Bones pràctiques
  • Activitats de disseny
  • Objectius educatius, objectius creadors

Hem pogut pensar i dissenyar activitats educatives per a fabricants. Adaptar les activitats a diferents espais, adaptar-se a diferents nivells d’edat.

Training course about Educational Maker Activities

This course propose a laboratory space to work from theorical contents to experimentation and building educational maker activities.

Objectives

– Teachers, educators and facilitators interested in new proceses between technology and pedagogy.
– Discover technology as a pedagogical tool.
– Learn how to design educational maker activities for different ages.

https://www.tutorbot.eu/

1. The makers: technology and non-formal education

Today, the new times demand from educators new skills and new resources that technology offers at low cost.

In this class

Topic of the lesson: the maker movement and non-formal education

At the end of this lesson, you should be able to/you will know about:

  • What is the maker movement;
  • Who are the makers, what they are making, and why;
  • Some concept underlying the maker culture.

Outline of the lesson:

  1. The maker movement
  2. Who are the maker
  3. What do they make
  4. Why do they make something
  5. The concepts of making underpinning the maker culture
  6. Activity
  7. Conclusion

1. The maker movement

You may have heard of makerspaces, and maybe even used one — but how did this global movement focused on making begin?

This movement is often described as being a grass-roots movement. This means it was formed from the ground up, instead of being organised by a governing body or inspirational leader. At the heart of the movement are individuals with making skills and a passion for sharing who together form a community of makers.

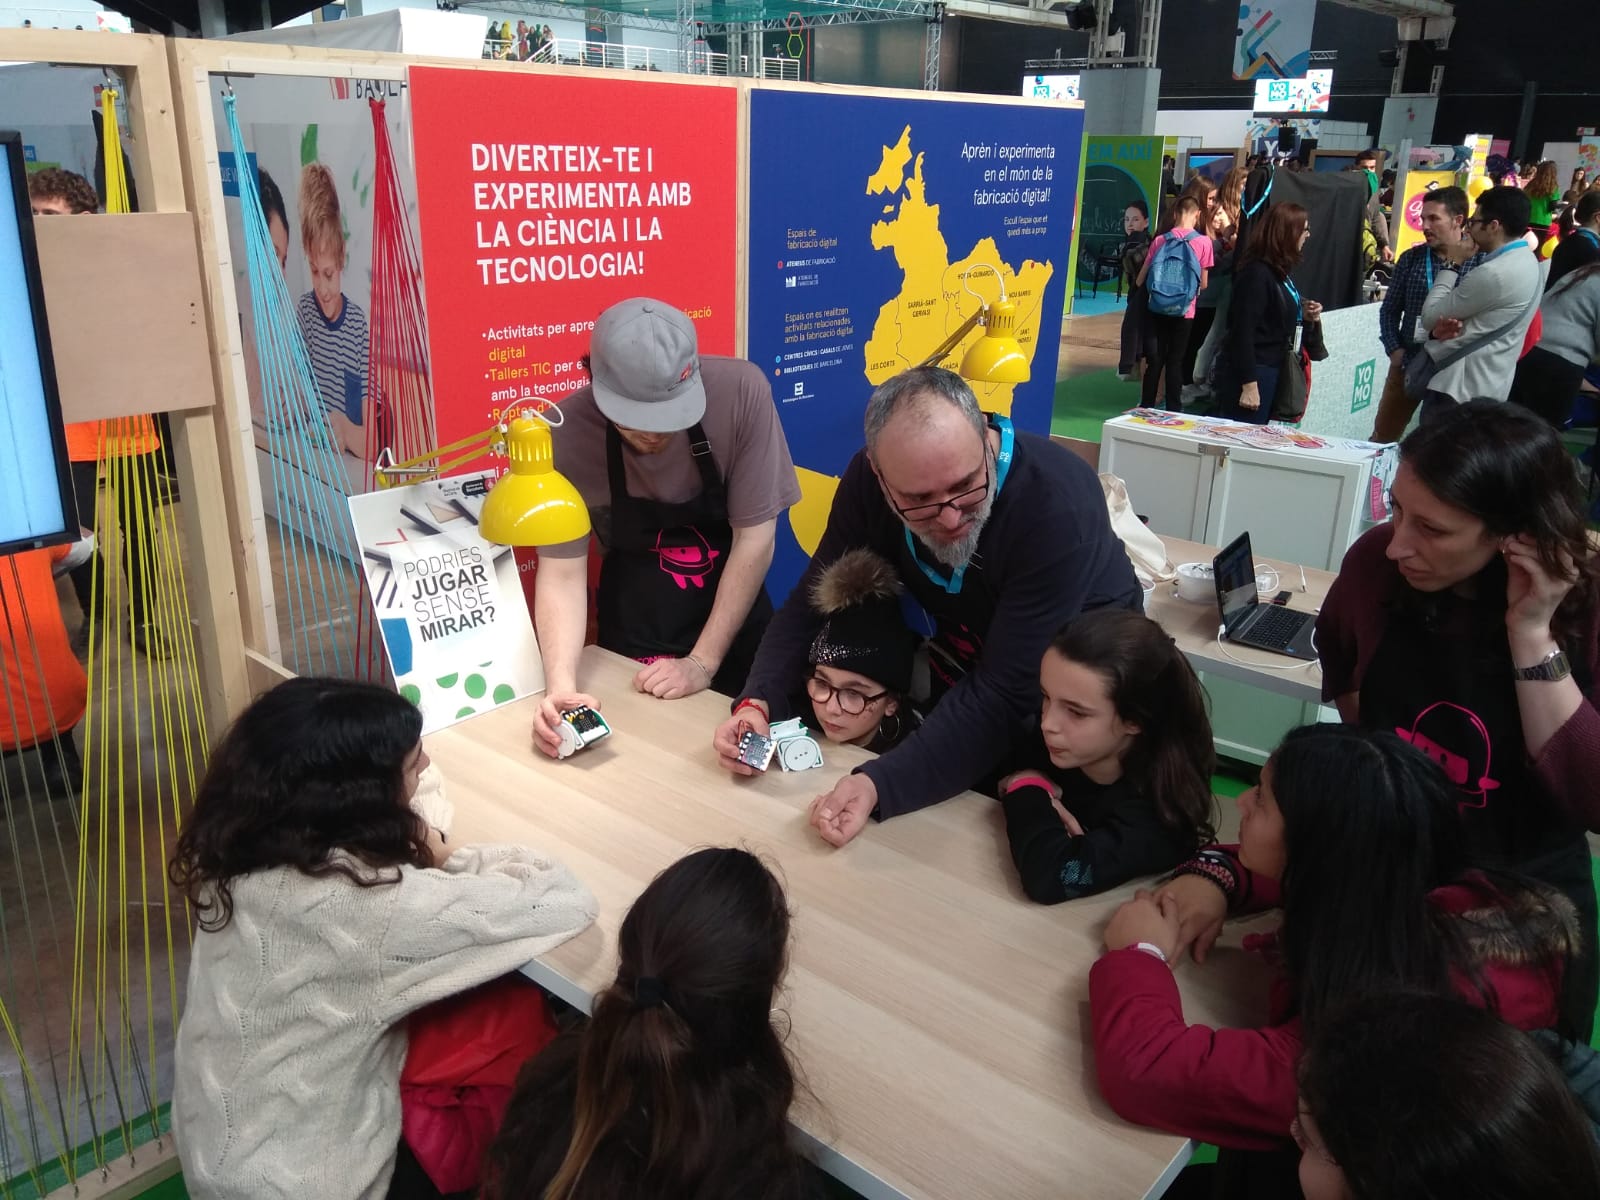
We’ve briefly introduced the idea of makerspace as an informal learning environment designed for tinkering and skill building. Now, to understand the benefits of bringing a makerspace into your community, we’ll explore the origins of the movement.

2. Who are the makers?

Everyone is a maker

The maker movement is open to everyone. This movement consists of people who use a mixture of digital and artisan skills to make and share inventions and creations in a recreational way in order to benefit themselves and their communities.

Many makers are hobbyists and enthusiasts excited to learn hands-on skills together in a communal space. Many even go on to become entrepreneurs, starting companies based on the innovations they’ve created. They are young and old, from all walks of life, with different professions and skill sets, all brought together by their love of making.

‘We’ is smarter than ‘me’
Working with others on a project of personal interest is common in the maker movement. Individuals collaborate to share skills, knowledge, and advice in order to achieve a goal. Sometimes this happens locally at a club or event, but it also takes place online. By accessing the hive mind constituted a large pool of individuals around the world, makers can achieve the best outcome for their project and learning journey.

3. What are they making?

People make projects that are meaningful, to them, e.g. to solve a problem in their home, school, workplace, or community — or just for the fun of it!

Traditional artisan and craft skills that are common forms of making include:

  • Woodwork
  • Steelwork
  • Sewing
  • Knitting
  • Paper and cardboard crafts

Digital making, or creating using digital technology, is becoming a more common creative pursuit in the maker movement. Affordable devices like Arduino and Raspberry Pi allow hobbyists and educators to create digital inventions that express something about who they are, and help them find solutions for issues and tasks in their daily lives.

Digital making skills include, but are not limited to:

  • Computer programming
  • Computer hardware
  • Robotics
  • Connected devices
  • Internet of Things (IoT)
  • Using open data
  • Physical computing

4. Why are they making some things?

According to Liam Grace-Flood, it is about doing together, and “coming together”. It is about the innovation, which comes from the people for whom it is made. It is also about integrating the tradition of the artisan, of the artist, etc. to build things. It’s about open-source, and thinking that more can be accomplished if we work together than if we work alone, or competing against each other. It is about continuing to innovate and develop things, at the same time as building links and relationships between people. And then, it is also about the culture of open-source, sharing and creating things the right way. In a way: “It’s not just about making things, it’s about making community, making a difference, and making a more just, open, and collaborative world.”

5. The concepts of making underpinning the maker culture

The maker culture is underpinned by concepts of making that are shared by those who are part of the maker movement:
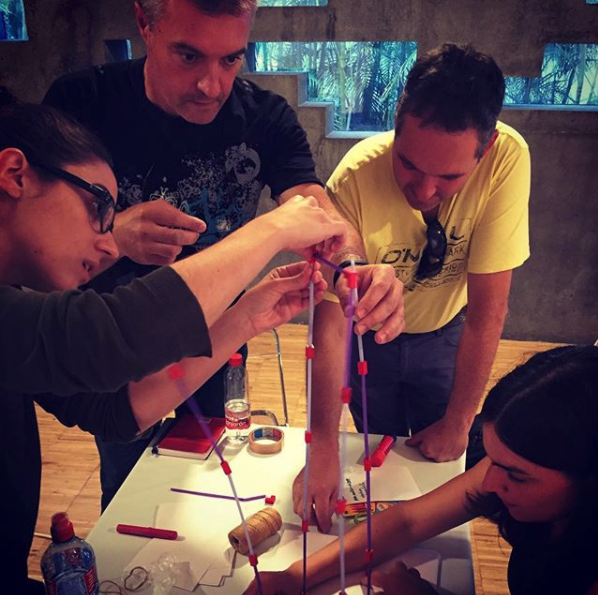
You learn by doing

Learning by taking part in an activity is not a new concept, especially in education, and it is fundamental to making. Some of the words used to describe this concept are tinker, hack, build, invent, and create. These conjure up images of using experimentation and getting hands-on to direct one’s learning and to keep motivated.

Self-directed and fun

Having the freedom to direct your own learning is very motivating. Makers’ project ideas often focus on solving a personal, local, or global problem. Makers have an idea which they break down into parts to identify where they’ll need skills they don’t have yet, and then they start to learn them as they build their project. It is a playful, personal exploration that results in making something that participants have pride in.

Sharing

In the maker culture, makers share not only their completed project with others, but also the means and process by which they created it, in order to learn more while writing a tutorial or guide, to get feedback, and to help others who might want to make something similar. Makers also share their skills with each other through meet-ups, workshops, and at events like Maker Faires. (https://makerfaire.com/)

Work in the open

Making may occur locally, but sharing often happens globally through the online publishing of the build process, code, project design, construction tips, and lessons learnt. Blog posts and uploaded video content are popular ways in which makers share their experiences to help make the overall community better informed.

Recycle and reuse

A lot of waste is produced from our day to day activities. As we upgrade our gadgets on a regular basis, electrical waste is becoming more of a problem. Many makers like reusing discarded products to build their projects. Therefore, makerspaces are often full of bins for plastics, wood, cardboard, electrical waste, and old toys from which anyone can grab what they need.

From the course BUILD A MAKERSPACE FOR YOUNG PEOPLE – RaspberryPi Foundation
CC-BY-SA 4.0

6. Activity

What concepts of making are you already promoting in your learning environment or space? Share with us in the comments section, and take the time to also discuss with your fellow course participants.

7. Conclusion: in this class

Today we studied the maker movement and non-formal education.

The most important notions were:

  • Maker
  • Maker movement
  • Learning by doing

We were able to define the maker movement and the figure of the maker. We also talked about the concept underlying the culture of the maker movement.

Next time, we will study the techno-pedagogical activities, in relation with the maker movement.

2. The maker movement and techno-pedagogical activities

Those are activities where technology plays an important role and is linked to the pedagogical lines that are being developed.

In this class

Topic of the lesson: the importance of techno-pedagogical activities in education

At the end of this lesson, you should be able to/you will know about:

  • What is the pedagogy of the maker movement;
  • What techno-pedagogical activities are;
  • Why they are important;
  • What is needed in order to conduct such activities.

Outline of the lesson:

  1. Definition
  2. Why are techno-pedagogical activities important/interesting?
  3. What is necessary in order to develop these activities in the maker movement?
  4. Activity
  5. Conclusion

1. Definition

A techno-pedagogical activity is one that works creative and innovative processes with an educational perspective, emphasizing practical learning during the process and not only in the result, and that includes, in some way, technology in all or part of the process.
A good example of the use of techno-pedagogical activities can be found in the maker movement: The maker movement has created its own pedagogy, which uses hacking, adaptation, design and creation as part of the learning about science and technology.

BULLOCK, S. (2015, MAY 11), What is maker pedagogy? Some early thoughts…
Retrieved from: http://makerpedagogy.org/en/what-is-maker-pedagogy-some-early-thoughts/

2. Why are techno-pedagogical activities important/interesting?

The techno-pedagogical activities are activities that work under a framework of cooperation, respect for each other, teamwork, inclusion, promotion of creativity, learning by doing and innovation.

In this regard, doing and creativity are not new concepts, but focusing learning on doing has introduced a new type of practical pedagogy, a pedagogy that fosters communication, community and collaboration (a DiT mentality «let’s do it together»), distributed learning (learning from various sources), crossing Frontiers and receptive and flexible teaching practices.

http://www.makerspaceforeducation.com/uploads/4/1/6/4/41640463/makerspace_for_education_curriculum_guide.pdf

The makerspace movement allows schools to return to a more constructivist education. It allows the students to be more creative, independent, and to know more about technology, as any modern education should do.

What is constructivism? It is a type of education, introduced by Jean Piaget and developed by Seymour Papert, in which the student is involved in his own learning. He creates at the same time as he learn, and he learn while being confronted to materials, objects, problems, etc. This kind of learning is very important in modern day education: “learning happens best when learners construct their understanding through a process of constructing things to share with others” (Donaldson, 2014, p. 1).

Nowadays, children (and adults) should not have to learn from a sets of theory and knowledge given, but from experimentation, creativity, etc.

Moreover, this allow for the development of a problem-solving mindset among the learners. In this regard, maker activities are a very interesting tool for the teachers, that can be used anywhere, at anytime.

Furthermore, the maker activities is also a great way to involve design thinking in the education. Design thinking is a way to solve problems before, during and after an activity. This distinguish it from the classical classroom learning, where the student replicate knowledge only after “receiving” it.

Finally, using maker activities in education also provide for a better media literacy. Indeed, today we face a profusion of medias, whether online or offline. In maker activities, as the learner has to get information by himself, he learn how to use medias and where to find information. In short, he has to locate himself among those flows of information (videos, articles, books, ebooks, websites, blogs, etc.).

3. What is necessary in order to develop these activities in the maker movement?

A team

Every activity has a human team that thinks about it, prepares it, carries it out and evaluates it. And in some cases, this team also receives the activity, and those who carry it out are external personnel to their space or project.

  • Responsible for programming activities, schedules, etc.
  • Responsible for giving the activity, usually the professional, educator or workshop.
  • Depending on where the activity takes place, we will find personnel responsible for the children or young people who participate in that location. It is important to involve them as a part of the process.
A space

The space is the place where the activity will take place. An activity of this type can be developed in any environment that meets the logistic needs of the activity.

Usually this type of activities can be produced and developed in:

  • A classroom or space within a cultural center, library or civic center.
  • A classroom or space within a school.
  • A space within a larger event (festivals, congresses, etc.).
  • A Makerspace.
  • The street.

To choose the space we usually take into account:

  • Available plugs, lighting.
  • Tables or spaces for working in groups.
  • Space area: ensure that it is sufficient for the number of participants, monitors, technical equipment, etc.
  • Possibility of organizing the tables or the space according to the dynamics of the workshop.
  • Space to organize the material of the activity.
  • Internet.
  • Number and type of computers.
  • Sound equipment, microphones, etc.
  • Board.
Materials | Resources

Boys and girls have an almost innate creative potential with almost anything, but creativity is also trained. Working with different materials and new tools can leads to empowerment processes. At the same time, one must be careful when introducing materials and tools so that they do not become disappointing.

Raising some techno-pedagogical activities focusing exclusively on materials or tools can lead us to errors. We must work with efficient, versatile and inspiring materials and tools that we know well how to use. Recyclable or reusable materials, such as cardboard or building sets, can help us create new interests and provide transformation experiences.

In any activity we can find resources and materials donated by the organization of the event, the institution, civic or cultural center and that we will complement with our own resources.

Expendable material

It is the material, whether stationery or technical, that, by using the activity, ends up included in the final prototype and therefore is consumed or finished and must be replaced for subsequent activities. As an example we mentioned:

  • pens and markers
  • papers and cardboards
  • post-its, clips, labels
  • blue tag, zeal, glue
  • clay
  • plastic cups
  • American tape
  • wood, cardboard
  • cables
  • batteries
  • silicone
  • battery holder / battery holder
  • mini engines
  • Leds
Non-expendable material

It is the material with which we work and that we can reuse in subsequent events / activities. As an example we mentioned:

  • Welding gun
  • Hot silicone gun
  • Cables connectors with the computer
  • Adapters
  • Network cables
  • Laity
  • Electronics kits: Arduino boards, Makey Makey, etc

4. Activity

Find examples in www.thingiverse.com or https://jam.com/ or https://diy.org/ and chose one share with comments.

Create your own activity, send a PDF with your proposal.

5. Conclusion: in this class

Today we studied the importance of techno-pedagogical activities in education.

The most important notions were:

  • Techno-pedagogical
  • Constructivism
  • Design thinking
  • Material

We were able to define the techno-pedagogical activities, from the experiences of the maker movement. We talked about the importance of those activities. And we also talked about what was needed in order to conduct such activities.

Next time, we will study about how to design such activities.

3. How to design such activities?

How can we design leisure activities that include technology in an easy and simple way?

In this class

Topic of the lesson: how to design techno-pedagogical activities.

At the end of this lesson, you should be able to/you will know about:

  • Every step of the organisation of a techno-pedagogical activity;
  • What are the more important points;
  • Some points to keep in mind;
  • Some examples of such activities.

Outline of the lesson:

  1. Organisation
  2. Budget management
  3. Communication
  4. Prepare the space
  5. Participants
  6. Process
  7. Ordering / cleaning
  8. Examples
  9. Activity
  10. Conclusion

Foreword

It is important to know that the environment where the activity takes place can become an aid to the process and motivate expression, creation and communication. That is why at this point we are going to give some clues in this sense. We have also prepared some technical files that can help in the organization and development of a model activity. They can be downloaded on the web.

1. Organization

To organize ourselves well, we must ask ourselves the necessary questions so that all the requirements of our activity are met or resolved and so that we can establish who will be responsible for carrying out each of the points. Some examples of things to keep in mind:

  • Public: we must take into account who our participants are. Activities for children or young people are not the same as for adults or the elderly. In any case, people are the key element of every workshop.
  • Contents: The workshop step by step. Program, public.
  • Calendar: time of preparation, dissemination and realization.
  • Place: contact and organization with the headquarters where the place is given.
  • Materials: list of needs, selection of suppliers and place of purchases.
  • Budget: personnel, materials, transportation, per diem, etc.
  • Communication: communication plan. Broadcast material
  • Documentation: who will take the record of the activity, videos and photos, in what formats.

It is also useful to know what our strengths are to take advantage of them and our limitations to be prepared.

2. Budget and management

Normally, in the field, the maker is tending to think that using digital technologies and recycled materials costs are eminently low. But although this is partly true, it is not entirely true. Whether it is an activity with free or paid registrations we must be cautious, clear and organized when making our budget and who is responsible for each section.

The management of the budget and the activity will depend on its nature and organization. Who promotes it, the space where it is carried out, if it falls within a schedule or is rather something punctual, etc.

In any case, the personnel, materials and transport of our activity generally depend on our own budget. It is always advisable to give an estimated margin on the production costs for any unforeseen event.

3. Communication

Once we have organized the contents of our activity, we know where, with whom and how it will be done, it is time to draw up a communication plan that will help us reach the public interested in participating. It is necessary to take into account before, during and after the activity in the communication process.

For the preparation of the plan it is advisable to take into account:

The public

If the participants are adults, we address them; without children or teenagers to parents. It helps to have an idea of whether they are from the neighborhood, how they seek or receive information.

Contents

Prepare a clear and brief text of the program, to whom it is addressed, the objectives of the activity, dates and registration data. The photos or illustrations that complement it help a lot.

Dissemination material

We can use and adapt the contents in brochures, flyers, posters, etc.
Network and community: do not underestimate the word of mouth. We can start spreading our activity from the staff of the center, the usual assistants, etc.

Web

It is essential to have an entry in the web of the project or center with the detailed information. By not having space limit, here we can place more photographs and expand a bit more on the fundamentals and methodology of the activity or any information of interest. The registration data (date, place, time, price and contact) must be clear and easily located.

Social networks

Once the information has been published on the web, it is best to disseminate it through social networks, in messages that provide content and that give information about the registration process. We will also have to answer the questions that arise.

Permits

In some cases we will have to follow certain rules of use and we will need some permits depending on where we locate the activity. These rules can come from the proprietary of the space, but keep also the law (e.g. city rules) in mind.

Image rights

It is always necessary to verify in advance that we have the rights of image assigned by each of the workshop participants to be able to make and disseminate audiovisual elements. For project inside of the EU, do not forget to take into account the GDPR. On the web you can find a model of transfer of rights document.

Document

On the one hand, if we can record the activity photographically and in video we will have material for later dissemination. On the other hand, it helps us a lot to write down how the activity has developed, how your organization has worked, assembly, materials. How the participants have reacted, their interest, their queries, their degree of understanding and integration in the activity, etc. And above all what has failed or can be improved.

Once the activity is done:

Self-evaluation

It is important to evaluate the actions a posteriori to know what has worked for us and what we should change in our future actions. It is useful to conduct participation surveys to find out by what means or channel they learned about the activity and if they would recommend it.

Communicate

With text, photos or videos, it is good to make a post on the web with the results, the process and perhaps some testimonies and also spread it through social networks.

The techno-pedagogical activities are activities that work under a framework of cooperation, respect for each other, teamwork, inclusion, promotion of creativity, learning by doing and innovation.

In this regard, doing and creativity are not new concepts, but focusing learning on doing has introduced a new type of practical pedagogy, a pedagogy that fosters communication, community and collaboration (a DiT mentality «let’s do it together»), distributed learning (learning from various sources), crossing Frontiers and receptive and flexible teaching practices.

http://www.makerspaceforeducation.com/uploads/4/1/6/4/41640463/makerspace_for_education_curriculum_guide.pdf

4. Prepare the space

  • Prepare the distribution of tables or workspace, depending on whether you will work in pairs, groups or individually.
  • Establish a site to carry out prototype tests.
  • Find a safe space to handle tools that require electricity or more care as a welding gun.
  • In the organization of the space we also think that we should take photographs or videos, so we must bear in mind that whoever makes the audiovisual record can do their work. But above all be aware of what things should not come out in the images or if a family member has denied the permission of image of the infant or adolescent.
  • Monitor the temperature and ventilation of the place depending on the materials and tools to be used.

5. Participants

We will find some highly motivated participants, or some others who will simply follow the instructions carefully and rely on partners to do things or even some who will need more individualized attention.

In the end, the important thing is to value each of the small achievements produced and to rely on them to manage the pace of the workshop; If these «hype or peaks» happen in a progressive way, they will generate the more or less continuous attention of the participants.

6. Process

Throughout the realization of our activities we have always been looking for the best ways to encourage participation and for the contents we want to transmit to be received in the best way. In our case, the design thinking process is the one that best adapts to this type of activity.

  • 1. Empathize

  • 2. Define

  • 3. Ideation

  • 4. Prototype

  • 5. Test

Empathize
  • Generate expectation, emotion, interest.
  • If it is the first session, we present each participant, support staff and facilitators.
  • We ask concept questions if necessary to know the expectations and information that each participant has. We listen, we clear up doubts.
Define
  • We explain clearly the development of what we are going to do in the activity, step by step. (eg we will work with recycled materials, in groups, we will take an engine, we will place a battery holder and a battery, we will connect it and we will test it for …).
  • We give some instructions. (eg, caution should be exercised with the 3D printer by …)
  • Sometimes videos or prototypes are shown to give an idea of the concepts and what we want to achieve.
  • If it is not the first session, we analyze what happened in the previous session to be clear about what we will do in the day.
Ideation
  • We went to do. We organize ourselves in groups or in pairs.
  • We deliver the materials.
  • We begin to think, to devise, to draw, to invent.
Prototip
  • Work cardboard, wood, stationery, etc. and we develop our idea to produce an initial prototype.
  • The feelings, results and what is learned is shared and commented among all, so we receive feedback and improvement advice from the group. The contribution of ideas must always be from the positive.
  • The final prototype should be real-sized so that it resembles as much as possible what we wanted to achieve.
Test
  • We tested the prototype, we corrected.
  • If the activity has more sessions, we return to the defining or devising phase, as the case may be, to improve or correct our prototype.

7. Order and cleaning

It is important, from the beginning of the activity, that the participants are involved in the order and cleanliness of both space and materials. Once the activity is over, all together we can collect the remaining materials, place the remains in their corresponding recycling baskets and leave the space as we found it.

8. Examples

Try a digital making project

Now that you’ve learned about digital making, you’re ready to create! Below are four digital making projects. Select one that most interests you. Make sure to record your observations, and save your accomplishments so that you can share them at the end.

Form a rock band

In this project, you will learn how to code your own musical instruments. By using Scratch, you can create a simple program to animate a band playing music on a stage. This is a great project for beginners who are new to coding or are more comfortable with block-based coding.

Build a robot antenna

In this project, you will build a cardboard robot with a Raspberry Pi and a real flashing LED antenna, and use Scratch to create a digital robot twin that beeps. The project was developed to teach students how to design basic 2D and 3D assets; to use basic programming constructs to create simple programs; to use basic digital, analogue, and electromechanical components; and to use basic materials and tools to create project prototypes. Check out the video guide at the top of this page for some extra tips on this project.

Make a rainbow predictor

In this project, you will use a Raspberry Pi and the temperature and humidity sensors on a Sense HAT to predict when there’s a good chance of spotting a rainbow. When the right conditions are detected, you will display a rainbow on the Sense HAT’s LED matrix. The project was developed to teach students to measure environmental conditions using sensors and combine programming constructs to solve a problem.

From the course BUILD A MAKERSPACE FOR YOUNG PEOPLE – RaspberryPi Foundation

Make a gravity simulator

In this project, you will learn about the effects of gravity and how to simulate them in Scratch with code. It was developed as part of British ESA Astronaut Tim Peake’s mission to the International Space Station to teach students about the force of gravity, combining computer programming and physics. Learn how gravity is calculated on different planets in our solar system while use basic programming constructs to create a simple program.

9.Activity

Share your comments about your experience. Did we miss a step?

With respect to the activity:

  • What did you make?
  • What did you learn?
  • Did you enjoy the project?

10. Conclusion: in this class

Today we studied how to design techno-pedagogical activities

The most important notions were:

  • Management
  • Idear
  • Empathize
  • Process

We were able to check the various step of the organisation of a techno-pedagogical activity. We also talked about a few points to keep in mind while doing so. Then, we reviewed a few examples of such activities.

Next time, we will study the skills and competences that should be taken into maker education.

4. What skills and competences should be taken into maker education?

How to access basic knowledge in a simple and practical way to apply in activities.

In this class

Topic of the lesson: the skills and competences that should be taken into maker education.

At the end of this lesson, you should be able to/you will know about:

  • What is needed from the animator;
  • Which skills and competences should be teached;
  • Some points to keep in mind.

Outline of the lesson:

  1. For the animator
  2. Which skills and competences to teach?
  3. What’s not on the curriculum?
  4. Activity
  5. Conclusion

1. For the animator

Digital making, or creating using digital technology, allows learners to mix their technical and creative skills while exploring new ways of bringing computer science to life in the real world.

For example, the Raspberry Pi Foundation: they spend a lot of time thinking about what you can learn by tinkering and making with a digital making device like the Raspberry Pi, and about what it takes to become skilled in computer programming, electronics, and physical computing. They have a good material to start and plan how to work skills and competences. The curriculum is there https://curriculum.raspberrypi.org/

2. Which skills and competences to teach?

Progression

Learning anything new involves progression. You start with certain skills and knowledge, and through guidance, practice, and understanding, you can gradually progress towards broader and deeper knowledge and competence. The digital making curriculum is structured around this progression, and in representing it, they wanted to avoid well-used age-related labels and the preconceptions related to these that are often associated with a learner’s progress. They came up with their own, using characters to represent different levels of competence: starting with being a Creator, you can move on to Builder and then Developer level before becoming a Maker.

Strands approach

With this activities they want to help people to make things so that they can become the inventors, creators, and makers of tomorrow. Digital making, STEAM, project-based learning, and tinkering are at the core of their teaching philosophy, which can be summed up simply as ‘we learn best by doing’. With this in mind, they’ve created five strands which they think encapsulate key concepts and skills in digital making: design, programming, physical computing, manufacture, and community and sharing.

Computational thinking

One of the most demanded skills for parents is to learn about computer science, Raspberry Pi promotes this and how to make things with computers. They believe that learning how to create with digital technology will help people shape an increasingly digital world, and prepare them for the work of the future. Computational thinking is a very important skill. It’s the thought process that underpins computing and digital making: formulating a problem and expressing its solution in such a way that a computer can effectively carry it out. Computational thinking covers a broad range of knowledge and skills including, but not limited to:

  • Logical reasoning
  • Algorithmic thinking
  • Pattern recognition
  • Abstraction
  • Decomposition
  • Debugging
  • Problem-solving

By progressing through this curriculum, learners will develop computational thinking skills and put them into practice.

3. What’s not on the curriculum?

If there’s one thing they learned from their extensive work in formulating this curriculum, it’s that no two educators or experts can agree on the best approach to progression and learning in the field of digital making. Their curriculum is intended to represent the skills and thought processes essential to making things with technology. They’ve tried to keep the key outcomes as broad as possible, and they provide examples as a guide to what could be included in lessons.

Their digital making curriculum is not intended to be a replacement for computer science–related curricula around the world. They hope that following our learning pathways will support the study of formal curricular and exam specifications in a fun and tangible way. As Raspberry Pi continues to expand its catalogue of free learning resources, they expect our curriculum will grow and improve, and your input into that process will be vital.

A PDF version of the curriculum is available for you to download. https://static.raspberrypi.org/files/education/DigitalMakingCurriculum.pdf

From the course BUILD A MAKERSPACE FOR YOUNG PEOPLE – RaspberryPi Foundation

4. Activity

Share your thoughts via comments.

We’re proud to be part of a movement that aims to empower people to shape their world through digital technologies. We value the support of our community of makers, educators, and enthusiasts.

Review the digital making curriculum and use the comments section to reflect on the following questions:

  • Is the curriculum useful for your space?
  • Can you use it to help you develop your makerspace?
  • Is there anything missing from it?

5. Conclusion: in this class

Today we studied the skills and competences that should be taken into maker education.

The most important notions were:

  • Strand approach
  • Computational thinking

We were able to define the competences that should be taken into the maker education. We talked about the importance of progression, and about a few specificities of the maker education.

Next time, we will study how to document an activity.

5. Documenting an activity

In this class

Topic of the lesson: how to document an activity.

At the end of this lesson, you should be able to/you will know about:

  • Why it is important to document an activity;
  • How to do it;
  • The importance of evaluation;
  • A few points to take into consideration.

Outline of the lesson:

  1. Why documenting an activity?
    > For us
    >For them
  2. How to document an activity?
  3. A few points to keep in mind
  4. Activity
  5. Conclusion
  6. For the animator
  7. Which skills and competences to teach?
  8. What’s not on the curriculum?
  9. Activity
  10. Conclusion

1. Why documenting an activity?

> For us

Documenting activities

Documenting an activity is important in order to rethink the production and communication process. We explained in the module 3: “How to design such activities?” that after realising the activity, we can find actions that we would do differently in the future. For example, if the material of a brand did not work properly; if we needed a room with more light or more space; if the diffusion needs more support with local partners, etc.

We also need to document the activity in order to have a global vision.

If it is meant to be a regular activity, we can talk with the participants and listen to their feedback regarding its development. This includes an anonymous survey of what they think of the process, the contents, the result and the experience.

Evaluating of activities

Once the activity is over, it is very useful to review the whole process, both the production and communication as well as the techno-pedagogical development of the activity, in order to evaluate each step and improve on future activities. In this step, the documentation helps the evaluation process.

On the development of the activity itself, if the activity is meant to be done on a regular basis, we can talk with the participants and listen to their feedback, and even include an anonymous survey of what they think of the process, the contents, the result, the experience. This will allow us to improve it for the next one. It also allows us to create a manual for future activities, with documented models and steps.

For the dissemination

The documentation of the activities is also important in order to disseminate your activities and to show what you are doing.

To have material

The documentation of the activities will provide us with material, which will be very useful not only for the communication, but also for the final evaluation of the activity, or to illustrate the annual report of your organisation, etc.

> For them

Publicity on- and off-line

The most obvious use of all the documentation material is to communicate about the activities. It can be used to promote further activities, to communicate during the activities (on live, or shortly after), to animate your social networks, etc.

Following their progress

As we saw earlier, self-evaluation is an important part of the maker movement, and it is an important process of education. Documenting each phases of the project helps the participants to realize where they come from, and where they are now. It helps them realize their progresses. It is even more important for large projects, that can last a few months, because in this case, it is harder for the participants to keep track of their progress.

2. How to document an activity?

Mobile phones and cameras help us document and capture the activity.

The same technical file that guides us for the workshop is very useful when making evaluation notes for each section.
First, it is important to think about how to document it before the activity. It does not means that it needs to be complicated, but it prevents us from forgetting documenting one part of the activity, for example.
Then, choose how you want to document it. If you opt for pictures, videos, interviews, etc, it can require certain skills, certain material, so this needs to be thought and planned in advance. The next step is to choose the person which will be in charge of the documentation. Everyone can take pictures, etc. during the activity, but this person will make sure that nothing is forgotten. If you wants certain contents, like videos, the person will need to have certain skills in this domain and to know how the material works. It can even sometimes require more than one person.

In activities with youngsters, we can let them document it themselves. Pictures and videos are allowed.

Below, we have a few questions that can be asked during or after the activity and that will help us both evaluate how things have gone a posteriori as well as to better understand the processes of each person and use them to improve in future activities.

  • What challenge are you working on?
  • What ideas do you have to solve the challenge?
  • Which ideas seem the best?
  • How does the first prototype look? Do you think it will work? Do you need more work to test it? What have you learned?
  • What did move you more?
  • What has been the best part of doing the workshop?
  • Have you learned anything from other classmates?
  • Important qualities that my invention must have to make it better.
  • What was the most difficult?
  • Do you want to improve something? Would you do something different next time?
  • Description / drawing / photo / video

3. A few points to keep in mind

One last important point: before starting the activity we need to have:

  • Permits: in some cases we will have to follow precises rules of use and we will need some permits depending on where we locate the activity.
  • Image rights: it is always necessary to verify in advance that each workshop participant provided us with the rights to use the image in order to be able to make and disseminate audiovisual elements. On the web you can find a model document for such transfer of rights. Do not forget to make it comply with the new GDPR of the EU.
  • Document: on the one hand, if we can document the activity with photos and videos, we will have material for later dissemination. On the other hand, it helps us a lot to write down how the activity developed, how your organization has worked, assembly, materials. It also help us see how the participants reacted, their interest, their queries, their degree of understanding and integration in the activity, etc. And above all, it shows us what failed and what can be improved.
  • Self-evaluation: the self-evaluation is important for the participants. It allows them to evaluate how the activity was useful for them. Moreover, it make them reflect on what they learned and what remains to be learn. It is therefore an important tool for their educational path.
  • General evaluation: it is important to evaluate the actions a posteriori in order to know what has worked for us and what we should change in our future actions. It is useful to conduct participation surveys to find out by what means or channel they learned about the activity and if they would recommend it.

4. Activity

Share your thoughts via comments.

5. Conclusion: in this class

Today we studied the skills and competences that should be taken into maker education.

The most important notions were:

  • Evaluation
  • Image rights

We were able to talk about the importance of documenting an activity, both for ourselves, as organisers, and for the participants. We also talked about how to document an activity, and which points should be kept in mind while doing so.

Next time, we will study the material, kits and knowledge that can be used in maker activities.

6. Materials, kits and knowledge

There are a lot of different materials and kits about techno-pedagogical activities. This activity tries to give an indication of which ones work better and which can be adapted to different ages.

In this class

Topic of the lesson: the material, kits and knowledge that can be used in maker activities.

At the end of this lesson, you should be able to/you will know about:

  • Which material to use;
  • At what age?;
  • Some basic equipment to start making;
  • A few interesting materials for makers;
  • The importance of technology.

Outline of the lesson:

  1. In this class
  2. Which material to use at what age?
  3. Equipment to get started
  4. Reflection on the materials
  5. Construction materials
  6. Computers
    • Raspberry Pi
    • Computing peripherals
    • Micro:bit
    • Makey Makey
    • Arduino
    • FLORA
  7. Activity
  8. Conclusion

Foreword

There a lot of materials and kits to develop techno-pedagogical activities. While it might be tempting to create an incredible innovation lab or makerspace or a great making hands on activities, it’s often a much better idea to add equipment over time. Craft materials and tech materials make for a good combination.

Chapters 1 – 4 adapted from: Maker Ed, with Davee, S. Mohammadi, G. Regalla, L and Chang, S. (2015), Youth Makerspace Playbook. Retrieved from https://makered.org/wp-content/uploads/2015/09/Youth-Makerspace-Playbook_FINAL.pdf

1. Which material to use at what age?

Understanding how the material and equipment work, what they make possible, and their strengths and limitations—is of critical importance for their safe use.
The right tool or material for any given job isn’t just the most effective—it’s the safest. Safe tool use begins with conversation.

When introducing a tool and material for the first time, it’s helpful to include learners in the discussion. Ask questions to spur discussion. What do you notice about the tool/material? What do you wonder about it? What can it be used for? What might go wrong? In this way, understanding and agreements about proper and safe use can be built collaboratively with youth, establishing shared ownership and investment. Resulting conversations may sound like, “It’s cool you can melt things with the soldering iron. I’ll bet it could hurt, too. Can it set paper on fire? Does it stay hot after I’m done with it? How can I let people know that it’s still hot when I’m done?” Many makerspaces establish that all tools, from hammers to laser cutters, require training before being free to use without adult supervision. Even trainings can be designed to be youth-centered.

At STEAMLabs, for example, when a new tool is introduced, the facilitator leads a conversation about the right tool for the job, followed by a conversation about how to use the tool. For the second time a child uses a tool, instead of telling them the rules for the tool again, children are encouraged to teach another child how to use the tool, with a mentor listening.

2. Equipment to get started

The key to a great makerspace isn’t about having all the expensive toys. You can create an amazing makerspace in a school with the simplest things: cardboard, tape, LEGO, playdough, scissors, and other simple tools. The key is making sure your space is adaptable and focused first and foremost on experimentation, creation, and innovation.

Traditional Tools

Traditional tools are interesting in that they are involved in many projects. Screwdrivers, scissors, drills, saws, etc. are therefore very interesting to include in the makerspace.

Office Supplies

Binder clips, brads, paper clips, rubber bands, paper, and notebooks are readily available, inexpensive, and hold endless potential. Those simple supplies can be used in many activities, and with infinite creativity. Paper is a great example: ubiquitous, versatile, and either taken for granted or incredibly creatively empowering, depending on how its use is invited. Having a wide variety of paper types on hand can allow for all sorts of creations and prototyping.

3. Reflection on the materials

The most efficient materials are those that can be reused. Construction sets, hardware, and salvaged components all can be used and reused in a large variety of projects and explorations.

Natural Materials

Think of any child turned loose to play in the woods, a park, a backyard, or on the beach. Chances are it won’t be long before they start gathering materials and creating things with them. Primordial materials like mud, sticks, leaves, rocks, sand, and water, abundant in quantity, offer potential for materials exploration, free play, or planning and constructing.

Salvaged and Recycled

Many abundantly available materials, like cardboard and plastic bottles, are headed en masse to the recycling center or, sadly, to landfills. There are countless projects that can be made with recyclables, which come in an incredible array of novel shapes and sizes.

Donated, Second-Hand, and Surplus

You never know what materials members of your community may have to donate until you put the word out

Project Scraps

Much of what might be considered “waste” in making can either be recycled or be valuable to reuse and inspire new projects. Often, a trimmed piece of fabric or cut end of a block of wood might be the perfect part for a new project.

4. Construction materials

Some of the best things you can source for your makerspace are simple craft supplies. Wire, tape, recycled junk, and cardboard can create the basis for some great lessons on design, materials, and engineering. Add some paper, string, and hot glue, and you can make a lot of useful things in a short time.

You can ask around in your school or venue for old LEGO and Meccano sets that people no longer use. In fact, any old toys that are no longer played with can be a great base for a maker project, and may also have useful components that might be repurposed for other makes and builds.

5. Computers

Ask around for old laptop or desktop computers that people are no longer using. You can also send out a letter asking parents to enquire at their workplaces, as companies may be giving away keyboards and mice that they no longer need. Even old phones and tablets are useful tools in a makerspace for a lot of design and coding work.

Raspberry Pi

You might well know what one of these is. The Raspberry Pi is a small, full-fledged, low-cost computer with an operating system that includes many free software tools for beginner-level and advanced programmers. Moreover, you can connect it to your digital making projects through its GPIO pins and control LEDs, buttons, motors — pretty much anything electronic you could wish for. The versatility of the Pi is its greatest strength, as it can run projects using a host of programming languages (including Scratch), and it can also be embedded into projects.

Computing peripherals

There are some really cool and creative peripherals around that kids can use to engage in some physical computing in the makerspace. Code for most of them can be created in a web browser, and some (e.g. the Makey Makey) allow students to push their creativity and design thinking by widening the range of ways to get the real world and the digital world to interact.

Micro:bit

micro:bits are handy little devices for which code can be written in a browser, and they then run the compiled code untethered (if powered by AAA batteries). In the UK, a million units were distributed to students in 2016, so you might have some luck asking students to bring them in for the makerspace if they aren’t using them at home. They include an accelerometer, a compass, an LED array, two contact buttons, and they allow wireless communication via radio and bluetooth.

Makey Makey

The Makey Makey is a USB-connected peripheral that allows students to interact with their code by ‘spoofing’ a keyboard: attach the Makey Makey to your laptop or Raspberry Pi, and by connecting any type of conductive material (e.g. fruit, metal, foil, people) to certain areas of the board with crocodile clips, you replicate a button on your keyboard. Makey Makey is a versatile and fun addition to any makerspace — projects we’ve seen include a game of Pacman controlled by a directional highfive, Dance Dance Revolution in buckets of water, and a fully automated landscape that reacts to the passing of a model train with sounds and lights.

Arduino

Arduino boards are embeddable devices that can read input, e.g. light on a sensor, a finger on a button, or a Twitter message, and and turn this into an output, e.g. activating a motor, turning on an LED, or publishing something online. The Arduino software is easy to use for beginners, yet flexible enough for advanced users, and it runs on macOS, Windows, and Linux.

Flora

FLORA is Adafruit’s wearable electronics platform. It’s a round, sewable, Arduino-compatible microcontroller designed to empower amazing wearables projects. FLORA runs on the Arduino programming language and IDE, and can be connected via USB so users can begin programming it right away. Another way to get fashion-conscious students hooked on digital making, the FLORA family of boards has all kinds of wearable, programmable additions like GPS, extra LEDs, sensors, switches, and power supplies.

6. Other materials

There are a lot of different other tools available for the makerspace. Indeed, tools like 3d printers, laser-cutter, vinyl cutters, etc. are very exciting. However, they are complimentary, and not necessary to start a maker activity

7. Activity

Create a PDF with a designed activity using one of this technological materials.

8. Conclusion: in this class

Today we studied the material, kits and knowledge that can be used in maker activities.

The most important notions were:

  • Equipment
  • Safety
  • Material
  • Computers & Computing peripherals

We were able to define the basic equipment needed to start an activity. Then, we talked about the importance of the materials. Those materials do not specially need to be very elaborate, we can recycle, reuse, etc. We also talked about the notion of safety while using certain tools and materials. Eventually, we talked about the importance of technology, computers and computing peripherals for the makers.

Next time, we will study the workshop space, how to organise it and experimentation in maker’s activities.

7. Workshop space and experimentation

In this class

Topic of the lesson: working space, tinkering, playful.

At the end of this lesson, you should be able to/you will know about:

  • How to design the space;
  • Some basic ideas;
  • Full of examples and good practices;

Outline of the lesson:

  1. Autodesk: Maker Program Starter Kit
  2. Play Facilitation: The science behind the art of engaging young children
  3. Littlebits: STEM Program Whitepaper
  4. MakerEd: Youth Makerspace Playbook
  5. Young Makers: Maker Club Playbook
  6. SpheroEdu k12 teacher resource guide
  7. SpheroEdu makerspace guide

Foreword

Foreword
Around the world, in every country, we can find lots of experiences and good practices. Here we meet different documents related with this good practices.

1. Autodesk: Maker Program Starter Kit

This guide provides ten steps with eleven hands-on activities to guide you and your team through the process of developing and launching a maker program in your school, organization or community. The worksheets and templates referenced in this Starter Kit can all be found in the appendix and in a Google Drive folder. These resources are available for you to use and revise to suit the needs of your team.

2. Play Facilitation: The science behind the art of engaging young children

Becoming a play facilitator takes practice and courage. Practitioners need to understand the importance of play in young children’s development, to feel empowered to lead sessions that focus on process, and to have concrete examples that model activities and scenarios; rather than recipes, these examples should provide a springboard for them to iterate and innovate. The combined professional judgment, skill and confidence, which this kind of support inspires, hold the key to success in practice.

3. Littlebits: STEM Program Whitepaper

A staple in many of schools’ STEAM programs is littleBits, a platform of easy-to-use electronic building blocks that empowers everyone to create inventions, large and small, like a self-driving car, art-drawing robot, or even a prototype of a prosthetic arm.

Over the past six years, the littleBits team has worked with thousands of educators around the country to implement hands-on STEAM and coding programs. From schools that are very new to STEAM to schools and districts that are fully immersed in STEAM education, littleBits helps educators to find the best strategies to scale their unique programs. Before sharing some of our learnings in the field, let’s take a step back and ask “why.”

4. MakerEd: Youth Makerspace Playbook

Welcome to the Youth Makerspace Playbook! Our goal is to help guide and inspire you in crafting spaces that are reflections of everyone in your community, especially the youth who will be benefiting from them (throughout this book, “youth” refers to children of all ages). We hope these pages will be a catalyst for your explorations, internet searches, and further reading.

5. Young Makers: Maker Club Playbook

Through Young Makers, we encourage everyone to start making in your communities and schools to create something of your own imagination. We know that the thought of getting a club started can be daunting, whether it’s finding a shop facility, recruiting young makers, recruiting mentors, dealing with liability, etc. This playbook is designed to help you navigate through the issues. It is written for club managers who represent Young Makers to the community at large and who coordinate the activities of a local group of young people who make.

6. SpheroEdu k12 teacher resource guide

Sphero Edu provides a toolset that is unbounded in its potential. Our program goes beyond code by incorporating robotics and technology with collaborative STEAM activities, nurturing students’ imaginations in ways no other education program can. So, what can you do with Sphero in education? Although the possibilities are endless, below are some ideas of how you could integrate Sphero into your educational setting.

7. SpheroEdu makerspace guide

This guide was written to provide a school, library or after-school makerspace program enough support to begin using Sphero and maintain some initial momentum. In other words, to help establish an instructional program that leverages Sphero in a makerspace, supporting everything from dedicated maker projects aligned with curriculum to original student-driven inventions / creations to after-school programs and even free play.

8. Conclusion: in this class

Today we studied how others think about making education, how companies that work on educational software or create STEAM kits make connections with education and makerspaces.

The most important notions were:

  • Reflection
  • Good Practices
  • Design activities
  • Educational aims, maker aims

We were able to think and design maker educational activities. Adapt activities to different spaces, adapt to different level of ages.

7. Activity

Create a PDF with a designed activity using one of this technological materials.